Healthy Smoothie Recipes

Man holding two mason jar glasses filled with strawberry smoothies with sliced strawberries against the glass.

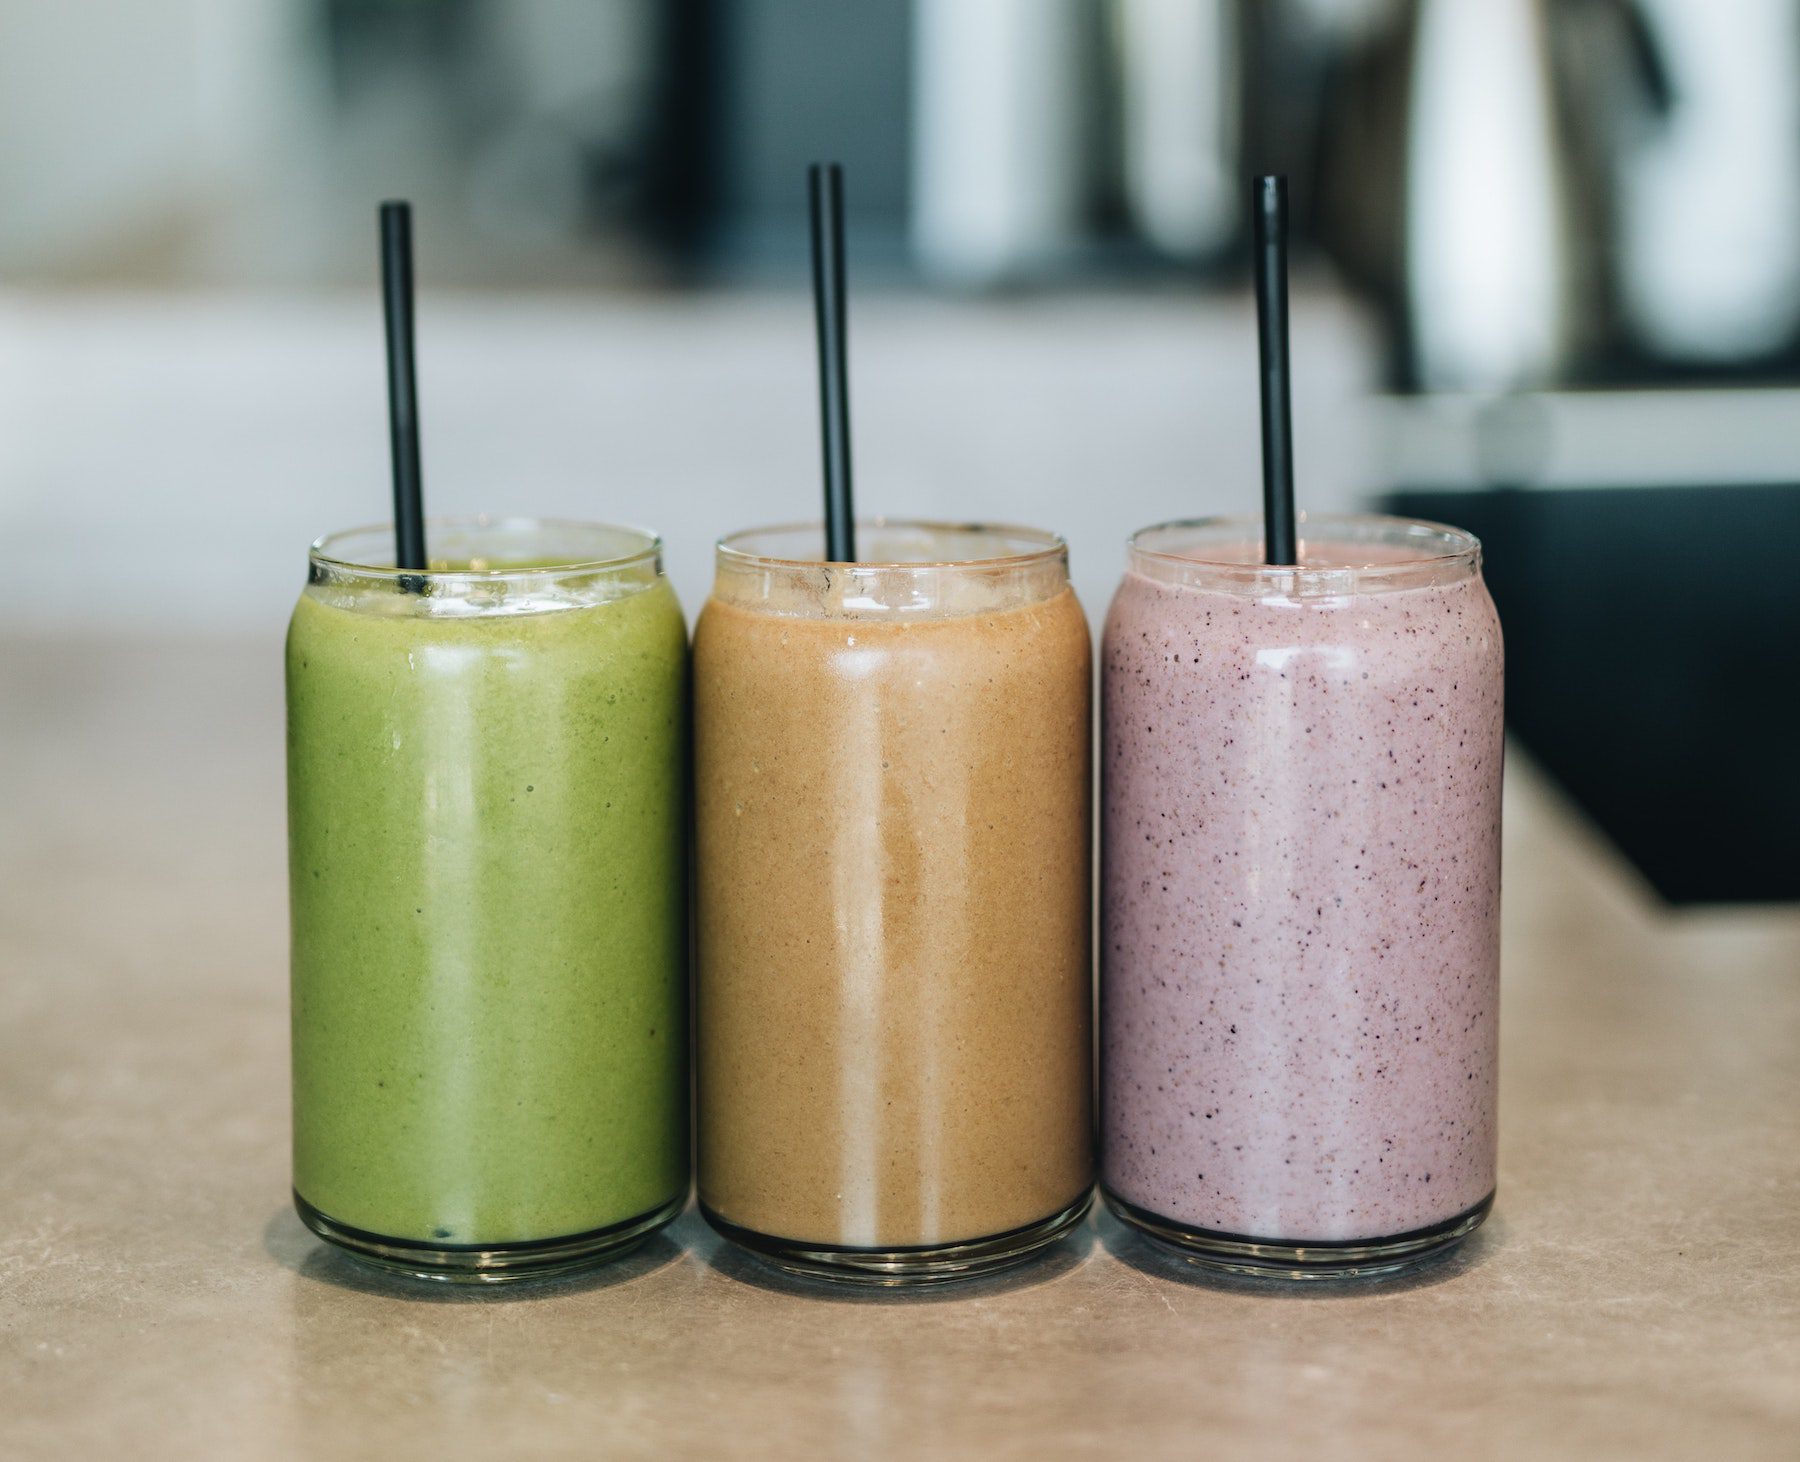
There’s nothing more refreshing after a workout—or a crazy morning commute—than a healthy smoothie. Easy to make, easy to carry, and easy to gulp down on the go, these delicious smoothie recipes can even be prepared ahead of time by cutting and freezing the produce. Best of all, these recipes are all vegetarian!

For all the recipes below, simply place your smoothie ingredients into a high-powered blender, and let it run for 30 seconds to a minute until smooth.


How to Customize Your Smoothies

Whenever you find a recipe you love, consider tinkering with its ingredients a bit so it can deliver exactly the nutrients and boosts you’re after.

Some great smoothie additions include:

  • Matcha. High in EGCG, which is believed to promote brain health, heart health, and weight loss, matcha also has a calming effect on the mind and body.
  • Chia Seeds. These are high in protein, antioxidants, omega-3, fiber, magnesium, and potassium. With the right blender, you can’t even tell they’re in your smoothie.
  • Oats. High in fiber, iron, antioxidants, low in fat, and great for lowering cholesterol, oats are a simple addition that bulk up smoothie recipes without too many calories.
  • Hemp Hearts. These are high in protein, as well as omega-3 and 6.
  • Ginger. This aids with nausea and upset stomach, and contains many anti-inflammatory properties. You can use it fresh, or in powder form, for a zesty kick to any smoothie.
  • Spirulina Powder. Packed with vitamin A, spirulina is also a great natural source of chlorophyll.
  • Almonds. With antioxidants and vitamin E, almonds provide a protein and flavor boost that pairs beautifully with most fruits. Additionally, they can lower harmful cholesterol.
  • Turmeric. Not only does turmeric boast anti-inflammatory properties, but it also increases the body’s ability to absorb antioxidants—which means it can boost all the other “boosts” you add to your favorite smoothie recipes! Turmeric can be used fresh, or in powder form for convenience.
  • Flax Meal. This smoothie additive is chock full of fiber, omega-3, and lignans (a type of antioxidant).


Healthy Smoothie Recipes


Strawberry and Banana Delight

Strawberry smoothie with berries on a windowsill.

Perhaps the most classic fruit combo out there, strawberry and banana give that perfect blend of sweetness, without being overwhelming.

While you can certainly use fresh fruit (just add some ice), frozen fruit really shines in this recipe: consider slicing and freezing your bananas and strawberries in a baggie, shortly after purchasing the produce.

Then, when a hectic morning strikes, all you have to do is dump the bag into your blender, toss in some chia seed and a little almond milk, and hit Puree.

  • 1 tablespoon chia seeds
  • 1 1/2 cups frozen strawberries
  • 3/4 cup unsweetened almond milk
  • 1 banana


Ginger Orange and Carrot Palooza

Orange smoothie with ginger and carrots on a blue table.

Zesty and sweet, this smoothie will wake you up and energize in no time. The banana acts as a base, more than anything: you’ll mostly taste orange and ginger.

Even the carrot isn’t that noticeable, which makes this recipe perfect for veggie-haters looking to diversify their diet.

  • 1/3 cup grated carrot
  • 1 cup fresh orange slices
  • One banana (frozen or not)
  • 1 tablespoon hemp hearts
  • 1/2 teaspoon of freshly grated ginger
  • handful of ice cubes
  • 1/2 cup almond milk


Pineapple Mango Paradise

A yellow smoothie on a light blue tabletop, garnished with a pineapple slice and greenery.

Escape to waterfront views and sunny shores…at least, for a few minutes. This simple smoothie delivers tropical flavor with a punch of protein.

  • 1 cup frozen pineapple slices
  • 1 tablespoon chia seeds
  • Whole banana
  • 1 cup frozen mango slices
  • 1 cup unsweetened almond milk


Avocado Cucumber Kale Super Smoothie

A kale smoothie with fresh kale on a cutting board, with two pink paper straws inserted.

This green smoothie is ideal for go-getters. Despite the high vegetable content, you’ll mostly just taste banana, and a smooth undertone of avocado.

If lack of sweetness is a concern, consider adding a little low-fat vanilla yogurt.

  • 1 tablespoon hemp hearts
  • 1/2 cup kale
  • about a quarter to half of a medium-sized avocado, or to taste
  • 1/2 cup peeled cucumber
  • Banana
  • Handful of ice cubes


Blueberry Lemon Desire

Hand holding a purple smoothie with a lemon wedge and fresh mint in front of a white wall.

Those blueberry lemon squares you loved as a kid are back—and this time, they’re actually good for you! Some classic oats bulk up this recipe with iron and fiber, but don’t dare take the spotlight off the real stars.

A generous serving of blueberries and just a little lemon keep this smoothie on the sweeter side, but feel free to juice things up: adjust the lemon additions to your personal preference.

  • 1/4 cup old fashioned oats
  • 1 1/2 cup frozen blueberries
  • 1/2 teaspoon lemon zest
  • 1/2 tablespoon lemon juice
  • 3/4 cups unsweetened almond milk
  • Banana
  • 1 tablespoon sliced almonds


Delicious Cherry Beet Surprise

Hand holding a bottle filled with bright beet-red liquid up to the sunlight.

Beets are a tough ingredient to work with: not many people like their earthy flavor. It’s a shame, since beets are loaded with folate and vitamin C, as well as betalains. These give beets their red color, but also protect your cells against oxidative damage.

Thankfully, the cherries in this recipe mask that earthiness of the beets, ensuring you get all the good stuff without having to hold your nose as you drink.

  • 1/2 cup cooked beets
  • 1 cup frozen cherries
  • 3/4 cup unsweetened almond milk
  • 1/4 cup old fashioned oats
  • Banana


Banana Pineapple Strawberry Haven

Pink smoothie in a mason jar in front of pineapple, bananas, strawberries, raspberries, and oranges against a pale pink wall.

Greek yogurt and banana make up the base of this classic-turned-powerhouse. With flax and spinach in the mix, you can enjoy the simply sweet flavors and know your post-workout treat is actually good for you.

  • 1 Tablespoon Chia or Flax Seeds
  • 1/2 cup Pineapple
  • 2 cups fresh Orange Juice
  • Banana
  • 1 cup Spinach (for an extra health boost)
  • 1 cup Strawberries
  • 1/2 cup Greek Yogurt
  • Handful of ice (optional)


Sweet Almond Cherry

Icy bright red smoothies in mason jar glasses against deep blue background.

This simple smoothie is low in calories, but high in protein—a go-to blend for anyone hitting the gym.

  • Scoop of protein powder, vanilla or unflavored
  • 1 cup Soy or Almond Milk
  • 1 1/2 cups Cherries frozen
  • Banana
  • Handful of ice


Tasty Greens Medley

Bubbly green smoothie in a blender pitcher with spinach leaves nearby on a marble countertop.

Don’t let the sweetness in this one fool you: with a pretty generous serving of spinach, the tropical taste is actually a clever vehicle for vegetables.

  • 1 1/2 cups Orange Juice
  • 2 cups Baby Spinach
  • Banana
  • 1 cup Pineapple
  • 1/2 cup Grapes
  • Handful of ice


Chocolate and Spinach Blueberry Twist

Chocolate blueberry smoothies in mason jars on linen tablecloth.

The really beautiful thing about spinach? Once it’s blended into a smoothie, you can’t even taste it. In fact, you might even get away with doubling the greens in this one, and no one would be the wiser.

For a bit of decadence, blend in a small handful of semisweet chocolate chips.

  • 1 cup Spinach
  • Scoop of protein powder (dark chocolate or regular)
  • Banana
  • 1/2 cup Blueberries
  • 1 Tablespoon fresh Almond Butter
  • 1 cup Coconut Milk
  • Handful of ice


Green Youth Super Smoothie

Two green smoothies seen from above on a white marble counter.

This is one recipe you might be happy to share with your kids. While it’s absolutely loaded with green veggies, the apple juice, lemon, and banana make it far more palatable than picky eaters might expect.

  • 1/2 Cucumber
  • 2 handfuls of Baby Spinach
  • 2 cups pure and unprocessed apple juice
  • Approximately 2 cups of kale or power greens mix
  • Banana
  • 1/2 lemon, squeezed
  • Handful of ice


Mango and Peach Tropical Delight

Two tropical orange smoothies on white tabletop.

This smoothie is heavy on the fruit, but doesn’t cross that line into “too sweet.” Instead, it’s got a great blend of smooth, mellow flavors you can’t help but devour.

Additionally, turmeric and ginger deliver just the slightest kick, to keep things interesting.

  • 1 cup cubed mango
  • 1/4 teaspoon turmeric
  • 1 cup fresh orange juice
  • 1/4 teaspoon ginger
  • Banana
  • 1 cup peaches


Get Blending

The best smoothie recipes balance health and taste. After all, it’s no fun chugging a bitter concoction, no matter how good it is for you.

With some creativity and testing, however, any veggie, fruit, and additive can become a star ingredient in your next blend…whether or not you can actually taste it.

In short, the smoothie has got to be one of the most overlooked snacks or meal replacements. Their versatility allows them to become almost whatever you’re looking for. Whether that be a breakfast smoothie, something to keep you going while you’re camping or hiking, or even when you’re out on the road to pick up your favorite healthy takeout option.


Eating Healthy While Camping or Bike Touring

healthy-eating-camping-fire

When planning a trip, you might see it as a reason to splurge or indulge.  After all, you’re on vacation! While takeout and your favorite chipotle hack can certainly be included in your meal plans, some trips—such as camping or bike touring—require healthy eating habits to maintain proper energy levels.

Not only that, but your options are usually far more limited. Fear not: this lack of options can actually enrich your experience. Roughing it under the stars goes well with roughing it at the picnic table.

For those embarking on long adventures, making your own meals and choosing your fuel wisely isn’t just wise: it’s a necessity, one that becomes more crucial, the further off the beaten path you venture.


Equipment You’ll Need for Healthy Eating on the Go


Camping Stove and Pot

Preparing hot meals on the road is as easy as investing in a small camping stove and pot. Additionally, in the long run, it’s much cheaper than paying for cooked food.

Try the Olicamp Micro Stove or the Esbit Alcohol Stove, along with a portable pot and utensils.

The gas canisters on which the Olicamp runs are lightweight, and easy to find in stores. One container will provide you with weeks of daily hot meals.

When it does run out, many gas stations and hardware/outdoor supply stores will carry similar canisters. That accessibility is critical for long hiking trips or tours, since populated areas can be few and far between.

Alcohol-powered stoves are another great option, and are generally more lightweight than gas stoves: the latter requires you to carry sizable fuel canisters, whereas an alcohol stove—though slower to cook—is far more portable.

If you’re not sure which to choose, consider your priorities. Do you need to keep your load light, or is time of the essence?


man stirring a meal inside a camping stove while sitting on the grass


Optional—but Helpful—Extras to Pack

Some luxuries to add to your cooking setup can include the collapsible X-Seal Plate and Mug Set by Sea to Summit, or this Morakniv Outdoor Knife.

Aluminum is widely accepted as the best material for on-the-go cookware, since it allows heat to travel uniformly throughout the vessel. This, in turn, leads to less burning and sticking.

If you’re mostly going to be traveling by car, your options are more far-reaching.

You could pack an entire grill, if you wanted to, even a cooler, mini-fridge, and a blender for smoothies.

However, if you’re taking a more self-contained approach (bikes or walking), look for collapsible, multi-functional cookware designed for durability.

Don’t forget to pack some water! Of course you could always stop by a gas station and grab your favorite snack and water. Or, you could always bring along your water filter or hydration pack.


Grocery Shopping Before Your Trip: The Staples

Carrying a few bulk staples will ensure you’re always covered for delicious and nutritious fuel, no matter what’s open or nearby.

Easy-to-use, nonperishable items include pasta, rice meals, nut butters, crackers, dry fruit oil, oatmeal, beans, and spices.

Canned fish can be an emergency protein source, along with any form of jerky.

If you’re going to be on the move, either on foot or by bike, have those essentials on hand when you depart, and stock up on perishable items along the way.

It’s always a plus to have canned vegetables available, too, in case you make a pasta or rice meal. Or, if you can, purchase fresh vegetables at produce stands, grocery stores, or farmer’s markets during your trip.

Topped with olive oil or pesto, this can make for a quick but delicious tent-side dinner.

For breakfast, oatmeal is a classic go-to because of its versatility.

Fresh or dried fruit, peanut butter, or even savory additions can liven up any bowl, and provide steadily-releasing fuel for the longest of excursions.


Campfire Snacking

The simple thrill of sparking your own flame is even better when you pair it with the classic snack-on-a-stick, whatever the ingredients entail.

Though delicious, the standard marshmallows aren’t exactly healthy. For more filling options, try hot dogs, sausage, peppers, or corn on the cob.


fresh corn, cucumbers, and peppers on a wood table


Keep Ingredients in Mind

Many portable snacks and staples out there claim to be healthy…but are they?

Granola bars are one excellent example of this: while they contain nutritious, whole ingredients like nuts and berries, many also boast a shocking amount of sugar, guaranteeing a mid-trail crash.

Some tips to help you choose the best products:

  • Go for whole wheat, rather than white. For rice, choose brown over white whenever possible. Whole grain goods are less processed, and therefore retain more nutrients than their refined counterparts. They also satisfy hunger better.


  • Keep sugar and sodium to a minimum. Granted, you’ll be exercising quite a bit while camping or bike touring but eating healthy isn’t just about caloric intake and output.  Sugar and sodium, in excess, can still increase blood pressure and wreak havoc on energy levels. Read labels carefully before purchasing, as many “healthy” foods contain more salt or sugar than you’d never expect. Tomato sauce and certain breads are one sneaky example.


  • Eat fresh as often as possible. This is extremely difficult when on the move, especially if you don’t have a cooler handy, but some careful route planning can ensure you encounter a fresh food source every day, or close to it.  That said, the right canned or dehydrated products can be healthful, too. Since eating healthy while camping or bike touring ultimately comes down to convenience, the adage “some is better than nothing” holds pretty true here.


A woman on a bike taking a break in the bike lane to drink water


Eating (and cooking) healthy meals while camping or traveling isn’t easy, by any stretch. Then again, neither is blazing a new trail, or riding a bike across an entire state!

Remember that the better you eat, the better you can hike or ride…and the more enjoyable your trip will be, as a result.

If you’ll be going on a longer and more rural adventure don’t forget a backpack! This is a vital tool that would allow you to carry a tent, water filter and anything else you may need.

Lastly, plan your first bike tour. You wouldn’t want to get going somewhere without some sort of direction. Failing to plan is planning to fail!

Comparison of the Best Personal Blenders

personal-blenders-smoothies-on-counter

Whether you’re on a fitness kick or having an inexplicable craving for kale, personal blenders are a convenient way to get your fix.

Frankly, not everyone needs a full-size, high powered blender. Maybe you’re not that serious about blending to shell out much cash.  Perhaps you just don’t have the counter space to devote to such bulky equipment.

If you fit into either of these camps, then a personal blender will work wonders for you.


Nutri-Ninja Fit Personal Blender

Nutri-Ninja personal blended pictured with accessories

The Nutri-Ninja Fit is perfectly balanced in every way: neither overly strong nor weak in any category, but rather, just right.

When you consider the compact size and elegant design of the Nutri-Ninja Fit, you’ll be forgiven for getting caught off guard by its sheer power and whip.

What’s more, the Nutri-Ninja Fit comes equipped with a 700-watt motor that’s practically whisper-quiet, compared to most personal blenders.

The superb utility of the Nutri-Ninja Fit does not outdo its stunning visual aesthetics, however. In other words, yes: it looks as good as it blends.

Small enough to be easily stored away after use, this portable and sleek beauty is ideal for on-the-go consumption: its 16-oz cups are marked with measurements.

On the cons side, it has limited volume, which isn’t great if you want to blend just a little more. It also lacks common buttons and automatic programming options of similar models.

That said, it’s easily one of the best personal blenders you can buy, and undoubtedly the best to gaze at as it graces your kitchen counter.

Find it on Amazon here.


Magic Bullet Blender

Magic Bullet personal blender filled with various fruits pictured with accessories

If you’re looking for a basic and quintessential blender, choose the Magic Bullet Blender. It’ll get the job done, plain and simple.

Fast and designed simply, the Magic Bullet suits on-the-go lifestyles well.

Despite its 250-watt motor, it is strong and durable enough to blend frozen fruit. This is assuming, of course, that you add the correct amounts of liquid, as is the case with most personal blenders.

However, it’s not great at more challenging ingredients, due to low wattage. If you like to mix things up with nuts or seeds, seek out a more powerful model. Ditto on ice, which produces varied results, according to user reviews.

Thanks to its sleek and cylindrical shape, cleaning up is a snap. When you consider its price, size, and ease of use, you probably won’t find a better bargain on the market. As an added bonus, the small footprint of this blender allows you to store alongside a water filter in a backpack for hiking or use it in a tent without taking too much valuable space.

Find it on Amazon here.


NutriBullet NBR-1201

NutriBullet personal blender pictured with additional accessories

It goes without saying that the NutriBullet is akin to the Magic Bullet, but larger—and more visually appealing.

In most cases, bigger is better…but in this race of convenience, that might be a drawback. Simply put, the NutriBullet lacks the versatility that its smaller cousin provides.

However, convenience alone isn’t all you have to consider when comparing personal blenders.

The Nutribullet excels in blending and style and might prove more durable than similar models. This makes it ideal for travelers who bring their blenders on the road (or the office commute).

With that in mind, however, its actual travel attachments are less than sturdy, though the blender itself can weather a great deal.

In terms of storage convenience, a larger-than-average base and bulky design will make this challenging for small kitchens.

Find it on Amazon here.


Oster BLSTPB-WBL My Blend

Blue, black, and white Oster personal blender filled with berries and ice

The Oster design will definitely appeal to fitness fanatics.

Though perfect for people who only have to blend together their pre-workout or recovery protein shake, the Oster has very narrow containers, which makes it challenging to clean if your smoothies or shakes contain solid ingredients.

Furthermore, due to the tint of the containers, they continue to look stained…even after a thorough (and difficult) scrubbing.

It’s also got the grating drawback of being incredibly noisy, and its design is less than pleasing, in terms of aesthetics.

All in all, this affordable blender will get the job done, though its longevity is up for debate.

Find it on Amazon here.


Nutri-Ninja Pro Personal Blender

Black and Silver Ninja Professional personal blender

Similar to the NutriBullet, the Nutri-Ninja Pro is massive—to the point where the word “personal” is no longer a suitable adjective. The cups are a whopping 24 ounces.

On the plus side, it pulverizes just about anything you throw into it, so that extra counter space might be worth sacrificing.

While it can’t boast the portability, convenience, and low volume of other personal blenders, it does have power on its side. Furthermore, it’s still smaller and quieter than most standard-size models.

Overall, this is a great option for people seeking a blender straddling the line between personal and full-size.

Find it on Amazon here.

Pink, berry smoothie in a glass with black straw sitting in front of a window with a banana, raspberries and blueberries


When shopping for personal blenders, consider size, convenience, customer reviews, functionality, and performance.

While smaller or quieter models certainly hold appeal, they might lack the power you need for your favorite ingredients. Likewise, more powerful personal blenders often come at the cost of space…and silence.

After you’ve found the best blender for your needs, be sure to experiment with different fruits and veggies to make a great smoothie recipe.


Best Home Workouts for When You’re Feeling Lazy

home-workouts-forest-floor-laying-down

You want to stay healthy and fit, but who wants to do all those strenuous exercises? Sometimes just getting out of bed or off the sofa is a monumental chore. Luckily, there are plenty of home workouts for lazy people (hey, no judgment). The best part: you don’t even have to leave your cozy little blanket nest to do them.


Working Out in Bed

A woman wearing a gray top sitting on her bed reaching her arms above her head to stretch

On days when you can’t bear to peel back those covers, try these in-bed home workouts to get the blood flowing and limber up.  Who knows?  You might get energized enough to leave the cocoon, after all.

And if not, at least you’ll feel better about lounging around all day.


Leg Stretches

Even when you are working out in bed, you have to stretch first. While laying on your back, pull your legs up, one at a time, to your chest. Grab the back of your thigh and pull upward, holding for a count of three. Do this 10 times for each leg.


Arm Stretches

Staying on your back, stretch both arms over your head as far as you can and hold it for 30 seconds. Do this 10 times. Be sure to stretch your legs out, as well.


Shoulder Stretches

Sitting up, slowly turn your head to the left, reaching out with your right arm. Use your left arm to grab your right shoulder and stretch, holding for 10 seconds. Do this on each side 10 times.


Quad Stretches

Lay on your side with your legs together. Bend your leg and use your hand to pull your heel toward your back as far as you can. Hold for five seconds. Do this 10 times on each side.


Back Stretches

Lastly, sit up and put your legs out straight in front of you. Bend at the waist as far as you can. Try to grab your feet and stretch your back. If you cannot reach your feet, it’s okay to just grab the back of your legs to pull yourself forward. Hold for a count of three. Do this 10 times.


Exercise On Your Couch

A man sitting on a brown leather couch with his legs outstretched on the cushion next to him

Yes, even devoted couch potatoes can exercise!  These are great home workouts for those in need of low-impact maneuvers, since the cushions of your sofa will ease pressure on your spine that normal yoga mats can’t diffuse.


Leg and Back Stretches

Sit on the edge of the couch and put your feet on the floor. Hang your arms and head down. Keep your back rounded; hold the stretch for a count of five. Do this 10 times.


Knee Bends

Lying on the couch, bend both knees and pull them up until your feet are flat on the couch. Use your hands to pull your knees up and into your chest. Hold for a count of five and do this 10 times.


Back Arches

Lying down, bend your legs and use your feet to push your hips up. Keep your arms at your sides to help push your hips upward. Hold it for five breaths, and repeat for a total of 10.


Leg Lifts

Lay on your side and lift your leg to form a 90-degree angle. Hold it for five seconds and then switch to the other side. Do this five times on each side.


Sit-Ups and Crunches

Comfy sit-ups or crunches can also be done on the couch (or in bed). You won’t feel much of a burn in your abs—but your spine and neck won’t be burning or aching, either.


Sitting Home Workouts

A modern style chair in front of a window next to a side table with a plant in a vase

Exercises done from a sitting position translate well to desk jobs  Take a break midway through your workday to try these seated home workouts.


Butt Builders

Want a better butt? Sit on the edge of your chair and keep your feet spread to about hip width. Your knees should be over your ankles, with your arms bent in front of you. Lean forward, letting your weight shift onto your feet as you lift your hips about five inches from the chair. Take one deep breath, and then slowly lower back down. Do this five times.


Chest Toners

Sit on a chair with your feet flat on the floor. With a three- to five-pound weight in each hand, loosely hang your arms straight at your sides. Pull them straight up toward your chest while rotating your arms. Repeat five times.


Biceps and Triceps

To work your arms and chest, sit on the edge of your chair with your shoulders resting on the back of the chair. Hold your weights, overhanded, up by your shoulders, with your elbows out and palms away from you. Straighten your arms out, pushing the weights up and forward at the same time. Repeat five times.


Easy Chair Planks

Planking is not as easy as it looks—but it is not as difficult as some people make it sound, either. Placing your forearms on the seat of your chair, walk your feet backwards until your body is in a straight line, and hold for 10 seconds. You can do these three to five times.


Get Up (But No Need to Roam Too Far)

Pink yoga block with a pink towel and red lightweight dumbbells atop a pink yoga mat

To make home workouts as effective as possible, you might have to leave that comfy chair or bed and get moving.  Not to worry, though: these are just as low-impact and simple as previous exercises.

In fact, just getting up might be the hardest part.


Stretches

Standing straight with your feet together, put your arms over your head as far as you can. Take a deep breath in as you reach upward, and then breathe out as you stretch toward the left. Hold for five breaths and return to the center. Repeat on the right side.


Easy Lunges

Kneeling on the floor with your knees bent, lunge forward with your left leg, keeping your knee at a 90-degree angle in front of you. Keep your foot flat and your right leg bent underneath you. Put both your hands on top of your left knee and push your hip forward, stretching. Hold for 10 seconds, and do it again with the right leg.


Superman Pose

Lying face-down on the floor (on a mat or blanket), hold your arms out to your sides at shoulder height. Point your thumbs up to the air and lift your legs, arms, and chest off the floor at the same time, like you are trying to fly. Hold for five seconds. Repeat five times.


Butt Crunches

Get those weights back out and work on your butt some more! Stand up straight, with the weights on the floor by your feet. Bend your knees and lean down to get the weights.

Keep your back straight and face forward. Stand up slowly with the weights in your hands, then slowly return the weights to the floor. Do this 10 times.


via GIPHY


These are some easy home workouts that anyone can do, which makes them perfect for people in recovery from illness or injury, or those brand-new to working out. Additionally, there are plenty of benefits when it comes to exercise such as better sleep and stress management. But, don’t forget to pair this lifestyle change with a healthy diet such as your favorite breakfast smoothies.

Remember to push yourself, but don’t go too crazy. Nothing kills a newfound fitness ambition like overwhelming soreness on Day 2. Build up that strength over time and then maybe you’ll be able to tackle that bike tour you’ve been planning.


The History of Skateboarding and Its Best Skaters

A closeup of a skateboarding performing a trick of grinding on a ledge

Skateboarding is a pastime enjoyed by many, from youngsters learning on their first board, to seasoned pros whose performance and handling leave spectators in awe. It’s so popular, in fact, that it’s now an Olympic event.

The history of skateboarding is, unsurprisingly, rooted in a very similar sport: surfing.

The 1950’s

Skateboarding got its start in the 1950s, in Hawaii and California, when athletes who sought the feeling of riding waves on dry land. It’s believed that skateboards already existed, in some form: crate scooters were already invented, and some people modified them to make wheeled boards.

Once surfers were involved, though, the sport really had legs. Early boards were rudimentary and comparatively slow to later versions, but this new class of “sidewalk surfers” loved them. Many even skated barefoot, the way they’d surf, and translate their maneuvers from ocean to land.

When the toy industry got wind that people were using a board to surf the streets, commercial skateboards came into fashion.


A skateboarder about to perform a trick as he's reaching down for his board at the lip of the ramp


The 1960’s

Roller Derby first launched the first mass-produced commercial skateboard in 1959, which marked its transition from “toy” to sports equipment. More companies followed suit, most notably surfing manufacturers who knew the sports’ crossover appeal was huge with current clientele.

Skateboarding competitions became more popular, with downhill races in San Francisco and other valley cities, but ultimately dipped in the mid-1960s when in- and outdoor roller derbies started.

The media painted skateboarding as dangerous, and the sport saw a decline in popularity.


A skateboarder preparing to safely land from his fall from an unsuccessful dismount or trick

The 1970’s

Like any sport, skateboarding changed constantly to make it more fun, challenging, and more welcoming to newcomers.

Frank Nasworthy introduced the urethane wheel with the company Cadillac Wheels. These plastic upgrades glided along city streets, instead of gripping them like clay wheels. They also lasted longer and, most importantly, were smoother and much faster. Suddenly, skateboards were both safer and more exciting.

Skateboarders started magazines; competitions took root; and the first man-made skate parks—rather than abandoned or repurposed construction sites—were born. Riders with different styles began clamoring for more, and customization shops popped up.

The 1970s and 1980s also saw the advent of tricks like the ollie. Thus, modern skateboarding was born.


The 1980’s

VHS cassettes featuring training techniques and new tricks became widely available. Magazines also detailed tricks and tips; new shops continued to pop up, offering new features on skateboards. Some boards became wider and longer. Depending on what you wanted, you could customize a board to suit your exact riding style.

Sponsorships, cash-prize contests, and the overall rising popularity of skateboarding made it possible for athletes to get paid skating.

The sport continued to spread, despite—or, arguably, because of—its reputation as a counter-culture activity: skate parks were now magnets for injury lawsuits, and boarding was banned in many public areas.


A trio of skateboarders taking a break and sipping on soda as they sit upon large steps

The 1990s

The introduction of the “Street League” for international racers helped skateboarding grow further as a professional sport, with cash prizes upwards of $200,000.

The televised X Games and its high flying aerials made skateboarding even more well-known. New skateboards and safety equipment meant newbies and seasoned skaters alike could attempt the tricks pro-skaters displayed on screen.


The 2000’s

Now that skateboarding is a professional sport and mainstream, few innovations have occurred in recent years.

The sport itself has continued to grow, though, with training videos readily available on YouTube, more X Game-esque competitions, and video games like Tony Hawk’s Pro Skater franchise, now boasting an impressive 21 titles.

Skateboarding is close to the height of its technical abilities, and has changed a bit for competitions like Red Bull’s downhill series, featuring serious downhill races on regular streets.


The Boarders

Tony Hawk

Embed from Getty Images

Tony Hawk is almost a household name, even if you don’t skateboard. Hawk landed the “Trick Heard Round the World” in the 1999 X Games by completing the first professionally landed 900 spin. That’s 2.5 revolutions mid-jump, a trick no skater had ever landed correctly in a professional competition.

Hawk is also well-known for his self-titled video game franchise, which was popular with skaters and non-skaters alike for not only the visuals and game physics, but its killer videogame soundtrack.


Paul Rodriguez

Embed from Getty Images

Rodriguez won a total of eight medals at X Games competitions, and later launched his own skateboard deck company, Primitive (https://primitiveskate.com/). He’s also a rapper and recording artist, as well as the owner of his own private skatepark.

Rodriguez last won a professional competition in 2012, and now focuses on acting, music, and his businesses.


Eric Koston

Embed from Getty Images

Despite being featured in Tony Hawk’s Pro Skater games, Koston is part of the generation of skaters who came before Hawk. He placed first in the X Games in the late 1990s and early 2000s.

He was featured in many videos for the Girl skateboard company and garnered many sponsorships, including a Nike shoe named after him. Koston now owns his own business, Fourstar Clothing.


Skateboarder Eric Koston performs a trick in the bowls of a skatepark by the beach

Skateboarding is now fairly mainstream and accepted (though you probably still can’t get away with skateboarding down the library rails). Its transition from a humble hobby to competitive powerhouse is, in large part, owed to professional skateboarders innovating both the equipment and the sport itself. As you’re riding your board, and hopefully not taking too many spills, find yourself listening to the best pop-punk songs or the best albums on Spotify.

Planning a Bike Tour with the Best Destinations in the US

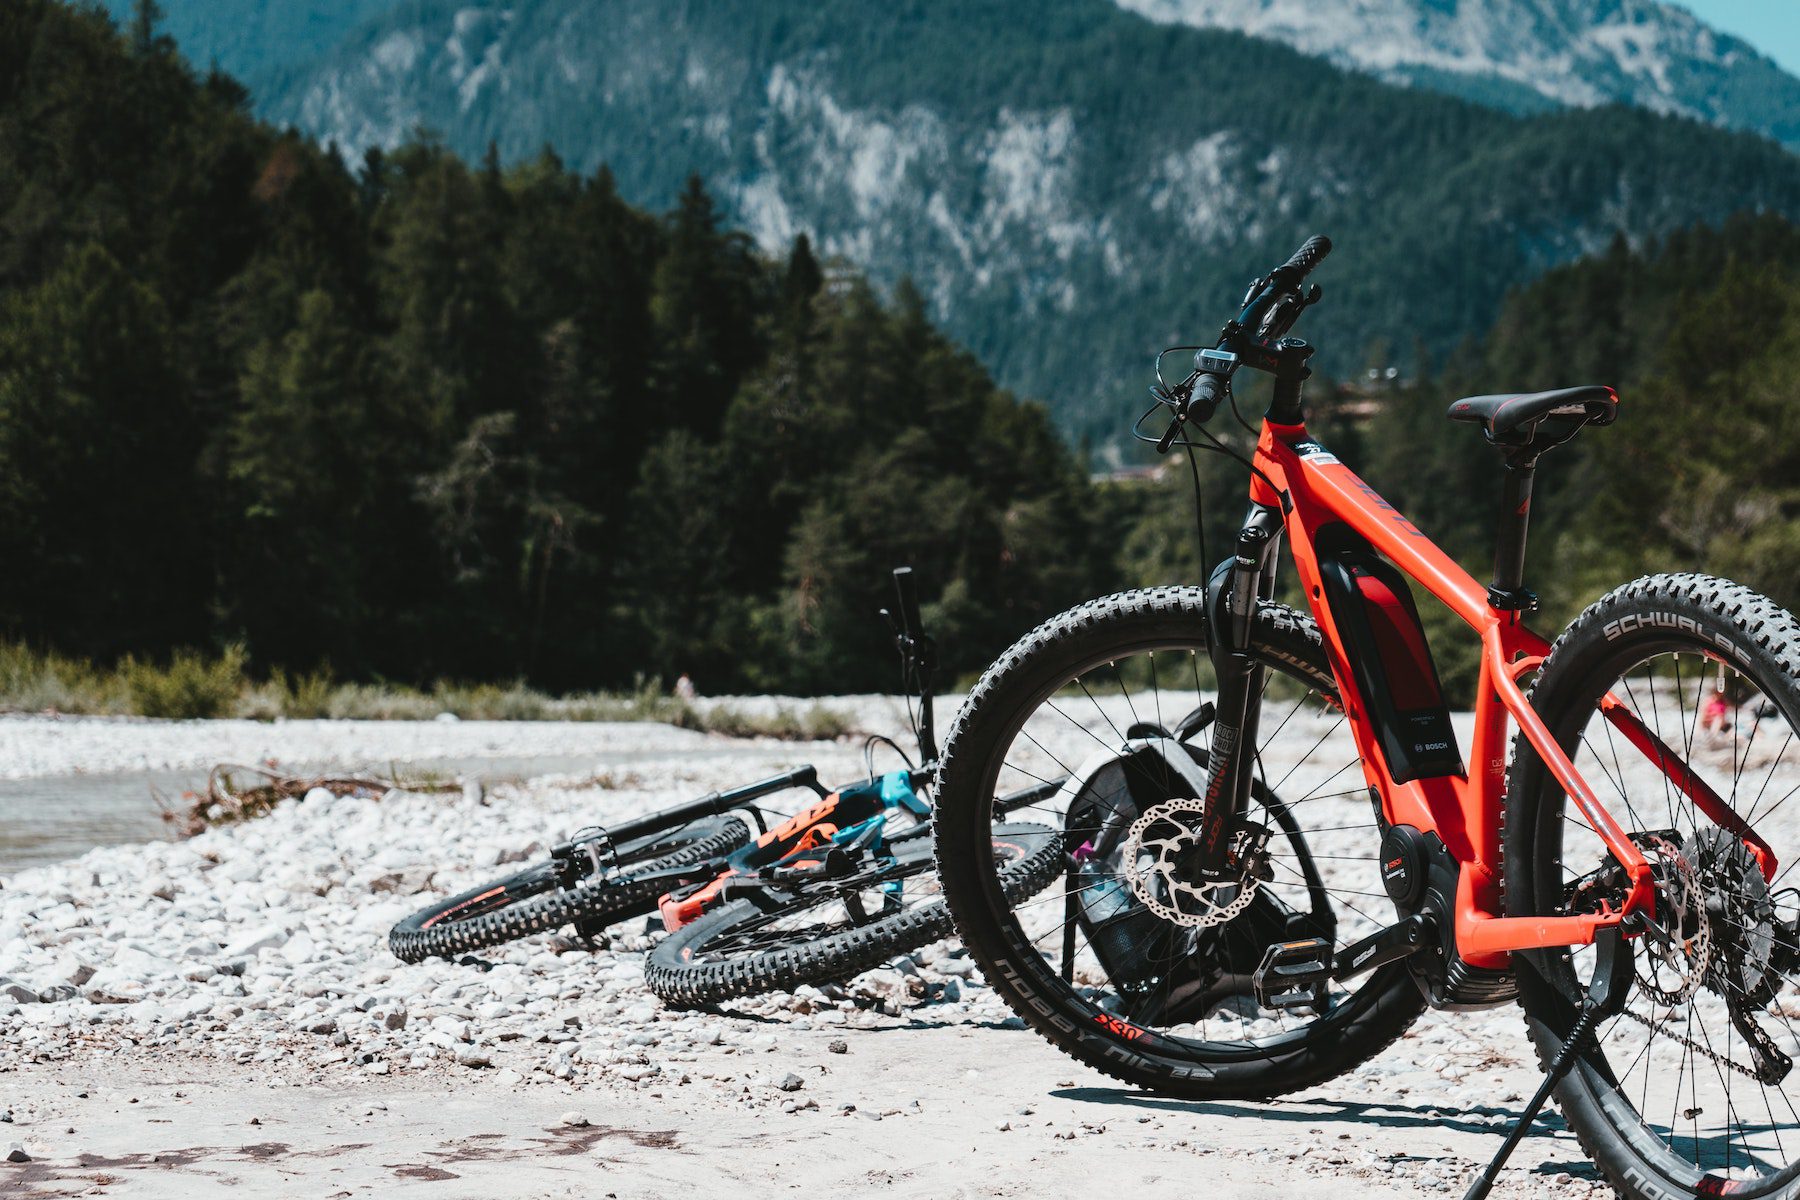
Red and blue all-terrain bikes on a mountain after a long distance tour or ride.

Many American sights are built around the probability that people will not only arrive by car, but stay in it as they take in the views. Parking lots, overlooks, scenic highways: they’re all there to make travel as convenient as can be. Planning a bike tour, however, is a way to deepen that sightseeing experience from a totally new vantage point.

It’s as much about the journey as the destination. Hovering between sport and adventure, long-distance cycling is an art of its own. Yet even seasoned riders can get lost amid the logistics when planning a bike tour.

The most crucial element is preparedness. You need to bring the right gear, plan your route efficiently, and know your own limitations.

This comprehensive guide to planning a bike tour covers the basics of preparing for your trip, all the gear you need to bring, and, finally, a list of some of the best destinations in the US to see by bicycle.


Planning a Bike Tour Route

A cyclist takes a break at a scenic overlook near his red bike.

First off, figure out where you want to go, and whether your budget, resources, and willpower will get you there by bike.

More importantly, make sure the roads you’ll be riding are bike-friendly; you don’t want to find yourself pedaling inches away from an eighteen wheeler.

Enter the Adventure Cycling Association, an organization that has been bringing bike touring to the people since 1973. Run by longtime cycling enthusiasts, ACA has compiled an extensive network of bike routes spanning the entire country. Along with hand-picked directions, their maps show food, lodging, and amenities available to cyclists on the road.

There are a number of long, car-free bike paths like the Katy Trail around the country which you can incorporate into your trip. Additionally, the Rails to Trails Conservancy (RTC) converts and maintains miles of multi-use rail trails throughout the country that can be a starting point for a shorter tour.

Chances are someone else has done a tour in your area, so check out Facebook groups to connect with other cyclists and get their recommendations.

Lastly, if you aren’t comfortable riding alone, ACA leads supported tours that might cost you a lot less than a standard vacation.


Overnights and Mileage

Once you know where you’d like to end up, plan your trip depending on where you’ll be sleeping. Everyone’s comfort level is different; you may prefer staying at motels, or you might be up for roughing it in a tent.

Either way, make sure you know where these and other resources are located. If your next campground turns out to be too many miles from the last, you could be left stranded.

This is especially important in terms of grocery stores. You definitely don’t want to get too low on food or water. Never assume there will be a store ahead of you, and keep meticulous inventory of your supplies.

Training before your trip is a smart move, too. Doing longer loops in your area will give you an idea of your daily distance: how far your can ride without overexerting yourself. This will help you map out your tour more efficiently.

Thirty to fifty miles is a good daily average to start with, but be careful not to overestimate your capabilities. Pacing yourself is one of the best things you can do for your body on a bike tour.


What Bike Should You Tour On?

What bike you ride can make a huge difference on tour. Like any decent vehicle, you don’t want it breaking down on you.

Now, that’s not to say you can’t traverse an entire state on a regular road bike. However, if you’re serious about riding long-distance, a touring bike is the way to go. Among all the unpredictable elements of being on the road, having a capable bike is one you do have control over, so don’t risk your safety or comfort with a subpar bike.


If Price Is an Issue

Touring bikes are built to carry weight, have diverse gears to tackle uphills, and can handle unpredictable surfaces thanks to stronger wheels and thicker tires. Your bike will be the biggest investment of your trip.

To put it another way, your bike will be your home, car, and companion, all rolled into one—so it’ll be well worth its higher price point.

For bicyclists on a budget, Craigslist or touring forums are always a good bet to score affordable used bikes and travel or camping gear.


Essential Gear to Pack on a Bike Tour

Cyclist in blue athletic clothing and black cycling shorts, resting on a glass-lined balcony beside a black bike.

Before departing on what might be your first bike tour, avoid the common mistake of underestimating the challenge ahead of you.

Even if you’re an experienced traveler, a tour of any length has different demands than a trip by vehicle or other means of transportation. When you’re out and exposed on your bike for multiple hours a day, the obstacles you might face are unpredictable.

Preparing for the trip is the part you actually have control over, so take the time to pack accordingly. This gets easier as you continue touring, but this gear guide is a good start for those who aren’t sure if they are over or under-packing for their first long-distance bike trip.


Apparel

As the saying goes, the weather is never the problem: the way you dress is.

If you’re going to be spending most of the day outside pedaling, have a range of clothing suitable for most conditions. Make sure you’re familiar with the temperature and weather patterns of the region you’ll be touring in, and plan for nighttime cool-downs.


Sweat-Wicking Clothing

Three cyclists with their bikes and gear chatting in the woods on a trail.

Invest in a few pairs of bottoms with sweat-wicking technology (this includes liner shorts, padded shorts, socks, and tights). Cycling- specific fabrics account for how much you sweat while exerting energy, and it’s important that your clothes aren’t soaked when you get off your bike.

Most of these fabrics have antibacterial, odor-free characteristics and dry quickly, making them a good choice for overnight trips. You can rinse them off before bed, then reuse them the very next morning.

Sun Sleeves

Sun sleeves can help you avoid prolonged sun exposure as you bike. These arm warmer-like covers often include cooling technology to keep you comfortable and protected.

Sunscreen needs to be reapplied (and gets messy when mixed with sweat). If you rely only on sunscreen, there’s a good chance you’ll end up oily, caked in grime, and slightly sunburnt by the time you get off the bike. Pulling on a pair of sun sleeves can save you from that Banana Boat headache later on.


Helmet

When choosing a helmet, focus on weight and airflow. Though definitely protective, a hard-shell helmet will not be the most comfortable when you are sweating all day.

The Giro Agilis, Giro Isode, and Specialized Centro are all budget-friendly examples of safe, breathable helmets to take on tour.


Rain and Cold Weather

Cyclists pedaling down a path on an overcast day following rain, reflected in a puddle.

Rain shouldn’t be a reason to miss a day of riding on tour. Unless conditions are dangerous, you should be able to keep moving even in a drizzle—provided you have a touring bike with capable brakes and tires.

A set of waterproof clothes is a must, even if rain isn’t forecasted in the area. You’ll want a waterproof rain jacket that can keep you warm and dry. Ideally, it will also have a hood that extends completely over your helmet.

Another staple: waterproof pants that can fit over a bottom layer. Showers Pass Club Convertible pants zip off at the knee, have reflective details, and fit snugly.

High-quality waterproof pants will be a financial investment, but one pair can take you through years of flash rainstorms.

The same goes for gloves and shoes. Lightweight waterproof gloves like this Showers Pass Crosspoint Knit pair will prevent your hands from getting pelted with freezing rain.

Base layers are compact enough not to take too much space and will keep you warm on cold nights. If you’ll be sleeping outdoors, be prepared for plummeting nighttime temperatures, especially if you’re planning a bike tour in mountain climates.

They can also be worn under your rain gear as an emergency layer.


Shoes

Your shoe choice is, arguably, the most vital part of your wardrobe to get right when planning a bike tour.

Pack two pairs of shoes: a lightweight low-top option, and a warmer waterproof model.

If you choose to clip in to your pedals, you’ll need the right shoes and cleats. In general, clipping in will give you a more efficient pedal stroke, but how much this matters while pacing yourself on tour is up to you.

If you don’t want to clip in, research flat pedal shoes to find the right fit for you. You will notice that cycling-specific shoes have very stiff soles to protect your foot from the pressure exerted while pedaling.

Since waterproof cycling boots can be higher-priced, consider shoe covers to protect your feet in the rain.


On the Road

Great views and incredible rides are just ahead…but so are flat tires, pouring rain, and pitch-black country roads. Mishaps are inevitable, so prepare for these hazards ahead of time with the right gear.


Lights

USB-rechargeable lights are the norm nowadays, and you can’t go wrong with a front light you can charge anywhere, such as the Blackburn Dayblazer 1100.

With a battery life of up to 12 hours, it’ll give you the visibility and peace of mind you need on tour.

Check out the other Dayblazers on Blackburn’s website, as well, which all come with a lifetime warranty.

Remember to have your front and rear lights turned on at dawn, in fog, and even in shaded areas.


Portable Pump

Again, flat tires are inevitable: no matter how carefully you map your route or research road conditions when planning a bike tour, you’ll lose air along the way. A lightweight portable air pump will make that annoyance a breeze to fix.

Try the Topeak Mini Dual DXG. Its built-in pressure gauge indicates when you’ve gotten your tire into the perfect pressure range.


Waterproof Bags and Panniers

Durable panniers are extremely important, since they protect and carry your entire world when on tour. Make sure you get a waterproof set like these roomy, dry, and sturdy Banjo Brothers panniers.

How you set up your bike is up to you, but two larger panniers in the rear and two smaller ones in the front is a standard. Add a frame bag, handlebar bag and seat post bag for smaller items, like tools and electronics.

Distribute weight evenly. Remember that your rear and/or front racks are a good storage option for your tent, sleeping bag, and other bulky items.


Camping

A person stands and watches the sunrise near their tent on a grassy mountain top.

If you’re planning on relying on motels and other indoor lodging on tour, you’re all set with the gear listed above.

If you’re camping, however, you’ll need a few specific items to make sure you’re well-rested when you tumble out of that tent and onto your bike.


Tent

This one’s a given, but quality matters. Ideally, invest in a weather-resistant and ventilated tent like Coleman’s Skydome Camping Tent.

Used gear will suffice just fine, of course, but make sure there’s no damage to the tent that can compromise your comfort, like holes or broken zippers.

Speaking of holes: if your tent doesn’t come with one, bring a patch kit to mend rips and tears quickly.

Additionally, consider lightweight options to minimize your load. Before departure, practice setting your tent up and breaking it down.


Sleeping Bag/Pad

Mummy-shaped sleeping bags are popular among cyclists because of their portability and warmth factor. A blow-up sleeping pad is a lightweight addition to your setup that will keep your back comfortable and protected.

Also, if you have the space, you can’t go wrong with a water-resistant blanket to either put underneath your sleeping bag for insulation, or to wrap yourself up in on stormy nights.


Cookware

If you’re planning a bike tour that’s on the longer side, you’ll probably cook at least some of your own meals.

A portable gas stove like the Olicamp Ion Micro Titanium Stove and a camping pot can help you eat healthier and save money. The Olicamp runs on fuel canisters, allowing you to make anything from outlaw coffee, to a nice, hot plate of pasta.

It might sound like the last thing you want to do at the end of a six-hour bike ride, but preparing something hot is a huge plus. This is especially true if you find yourself in an area without restaurants (or pull into a campground late).

Using the stove is almost like throwing together a quick dinner at home—even if your apartment kitchen is a little nicer than that rotting picnic table.


When Planning a Bike Tour, Gear Matters Too

Even if you’re on a tight budget, what you bring with you on tour will determine the quality of your experience.

By no means do you need to have the latest camping gear or technology to enjoy yourself and stay safe, though. It’s just a matter of basic human needs for nutrition, shelter, and warmth. And these needs become very obvious when you’re on the road.

Touring is inconvenient by nature. That’s part of its appeal, however. It pushes you out of your comfort zone, and into new places, interactions, and (hopefully) perspectives. Packing properly with gear that keeps you warm, dry, comfortable, and hydrated will make your tour unforgettable.


Bike Touring Destinations in the U.S. (By Region)

The silhouette of a cyclist on their bike during the sunset.

When planning a bike tour, it’s tempting to want to see it all in as little time as possible. Keep in mind, though, that sight-seeing on a bike is vastly different from traveling by vehicle.

You’re your own engine, and you don’t want to burn out between Point A and Point B. It’s better to choose a handful of must-see destinations and actually enjoy your ride, rather than conquering a massive travel checklist all in one tour.

Starting out close to home is a good idea if you’re new to bicycle touring. Check to see if there are any bicycle loop trails near you. Your endurance is usually lower, and the discomfort of long rides will be mitigated if you give yourself plenty of time between destinations to rest.

But, if you have some touring experience and are looking for a challenge, customize your path by connecting existing routes like those created by the Adventure Cycling Association (ACA). The ACA website also offers access to the U.S. Bicycle Route System (USBRS), a collection of state- approved bike routes throughout the country.

The following is a list of destinations that can be reached by bike in different regions of the United States. Always exercise caution when biking on shared roadways.


Northeast

While it can take weeks to explore every corner of New York City by bike, the rest of the state is better suited for a long tour. (Scenically, at least).

State Bicycle Route 9 can take you from the city to the Canadian border, 345 miles to the north. After the riverside views of the Hudson Highlands, the ride climbs into the Adirondack Mountains, which boast some of New York’s wildest terrain.

Prepare for plenty of uphills, maple syrup, and lakeside communities like Lake George Village, or the quieter Schroon Lake.

Once you hit the banks of Lake Champlain, take a detour to Vermont via the Lake Champlain Bridge, or the ferry from Port Kent to Burlington.

For an east-west excursion, the 360-mile Erie Canalway cuts across the state, following the historic Erie Canal.

Expect rolling farmland, canal locks, and towns bearing the evidence of New York’s role in the Revolutionary War.

If you’re traveling west, your finish line will be the roaring trio of Niagara Falls.


Appalachia

If you’re looking for elevation along with history, and one of the coolest places to visit, Virginia has a lot to offer for those on two wheels.

For an extended experience, get on the TransAmerica Trail (U.S. Bicycle Route 76) in coastal Yorktown. The route travels the entire length of Virginia, crossing borders at Kentucky’s Breaks Interstate Park.

The Virginia portion of the route measures over 400 miles, taking you over the Blue Ridge Parkway in the western part of the state.

Often remote, wooded, and gorgeous, this section of the TransAm is diverse enough to plan an entire trip around. Try out detours like the Creeper Trail, which is a 34-mile long bike path connecting Abingdon, Virginia, with the Appalachian Trail town of Damascus.

Don’t miss colonial Williamsburg, downtown Charlottesville, or historic Roanoke, either. Be ready for long climbs once you reach the breathtaking Blue Ridge Mountains.

Williamsburg, Virginia, during an orange sunset.


Southeast

If you’re further down the coast, the East Coast Greenway is a one of a kind resource to take advantage of when planning a bike tour.

Good news: you can make your Greenway ride as long as you want. The entire trail is 3,000 miles long, stretching from the Florida Keys to Maine’s rocky beaches.

The entire Florida coast can be a shorter section ride. Starting in Key West, the greenway ride to Jacksonville totals about 600 miles, including stretches of pristine Atlantic beach, Spanish colonial architecture, and just as much greenery as sand.


Midwest

The Midwest is vast, but Missouri’s Katy Trail is within a day’s drive from several large cities, including Chicago, Kansas City, and Louisville.

This is another cross-state ride, beginning just outside of St. Louis and ending in Clinton, Missouri. Over the trail’s 240 miles, experience trailside communities like Sedalia, Augusta, and Rocheport.

The trail mostly gravel, so prepare accordingly. You’ll need thicker tires and, ideally, a mountain or gravel bike.

The Katy Trail is a green, serene, and traffic-free choice for a shorter tour. With multiple access points by car or Amtrak, it can be forgiving to those who aren’t used to riding long-distance.


Southwest

Aerial view of Phoenix, Arizona.

Tucson is a dream destination for winter cyclists. Since the establishment of Arizona’s Bike Route 90, it’s easier to make the city a focal point of a long-distance tour.

Route 90 is about 575 miles. It extends from Cochise County (home of the quaint mining town of Bisbee) to Maricopa county in the western part of the state.

From the Sonoran desert, cyclists can pedal north through Tucson, traverse Phoenix, and ride to the California border.

Though the remote nature of the route requires advance planning, there’s nothing quite like experiencing the vastness of the landscape at a cyclist’s pace.

In Tucson, make sure to ride the paved Loop around the city, and try the Cactus Forest Loop in Saguaro National Park. The Park offers multiple cycling trails and striking desert fauna making it one of the best national parks to visit for cycling. Get in at sunrise or sunset for golden views!


West

The Oregon coast is one of the west coast’s most popular touring destinations.

The Oregon Coast Bike Route will take you from Astoria, in the state’s Northwest corner, to Brookings, a town tucked into the southern Oregon coastline.

Windy and wild, the route rarely strays from the shoreline. You’ll pedal right along the Pacific, with stops in seaside towns like Cannon Beach and Florence.

Ride north to south to avoid headwinds. Expect drizzle, fog, and dramatic cliffside scenery.

If you end up in Brookings and are craving more, hop on ACA’s Pacific Coast Route. You can follow it south through California all the way to the Mexican border.

Remember to pace yourself, research cycling conditions in the areas you’ll be passing through, and be proud of every mile.


More Helpful Tips for Planning a Bike Tour

You’ve got a route in mind, proper gear, and a departure date. But before you embark on that epic bike tour, here are some final tips to make that ride as legendary as possible.


  • Allow for rest days. Your body will be challenged during your ride. Taking a day once or twice a week to relax will keep your spirits up (and your muscles grateful).


  • Don’t set hard mileage expectations. While you’ll sometimes need to bike a certain distance to get to where you’re sleeping or eating, give yourself the option of biking less or more whenever possible. Planning a bike tour with that little bit of “cushion” will make all the difference in how you feel afterwards. Listen to your body, and remain as flexible as you can.


  • In a pinch, a local fire or police station may point you towards a safe place to camp, or even let you pitch a tent on their premises.


  • Bike shops and churches are often willing to give pointers. Oftentimes, you can call ahead to scope out the situation.


  • Don’t underestimate dogs! Your first instinct might be to out-bike them, but that can go terribly wrong if an animal gets underneath your wheel. If your air horn isn’t successful, stop and shield yourself with your bike. Yelling at the dog while pointing at it can assert your dominance. Continue making yourself loud and large while backing away until it’s safe to get back on your bike. If you can wave down a passing car, the motorist can honk at a dog to scare it away.


  • Pay attention to bear-prone areas you might be crossing and camping in. Bring bear bags and bear spray just in case.


  • Unless you’ll be staying indoors, prepare to be shower-free for a while. Bring a quick dry towel for when you do shower. In the meantime, a simple washcloth and Starbucks sink might have to do. If you’re lucky, you may be able to find a couple showers on the road.


  • Wear a helmet—always.


  • Use lights at night, early in the morning, while riding in fog, or any instance when visibility is less than ideal.


  • Do all you can to make it easier for yourself. That might mean saving up for a weekly hotel stay, or listening to music as you ride.


Remember Why You’re Riding

A cyclist in a blue helmet stops to take in the mountain view on a rocky beach, while his red bike sits nearby in some grass.

Don’t forget that your trip is an adventure as much as it is an endeavor. It isn’t easy but planning a bike tour properly can deliver an unforgettable travel experience no other transportation method offers.

Touring is a special way to experience the country at a rare pace. It allows you to directly interact with the world around you. On your bike, the weather matters. The way the land dips and rolls matters, because it’s under your tires.

Being out on the road brings you closer to coexisting with both the natural and man-made. You might walk away knowing more about your capabilities and limitations.

Better yet, you might choose not to walk away at all.

So, the next time you’re feeling a little bored, get out on that bike and hit the open road. Enjoy that crisp air, the cool breeze rushing past you, and the beautiful scenery that surrounds you.


via GIPHY


Gold Standard Whey Protein Flavor Reviews and Nutrition Facts

Label for Gold Standard Whey Protein powder.

Gold Standard Whey Protein by Optimum Nutrition is the most popular brands of whey protein on the market. Their protein blend is powerful yet tasty, which is way more than most protein blends can offer.

Learn about the nutritional details of Gold Standard Whey Protein, as well as which flavors are the best—both in terms of taste, and health.

If you’re just here for the flavor rankings, here’s a quick summary of consumer favorites:

Rank Flavor More
#1 Extreme Milk Chocolate Read More
#2 Delicious Strawberry Read More
#3 Double Rich Chocolate Read More
#4 Rocky Road Read More
#5 Banana Cream Read More

See All Flavor Reviews

Nutritional Information about Gold Standard Whey Protein

One of the things that Gold Standard advertises most about its protein product is that it is based on whey protein isolates (WPIs), which are the purest whey protein that currently exists. The cost for WPIs can be high, but they are the ideal whey for serious athletes.

All of Gold Standard’s whey flavors use the same blend, which is a mix of whey protein isolates, whey protein concentrate, and whey peptides to promote speedy recovery and lean muscle growth.

The rest of the ingredients in each bottle or bag of Gold Standard Whey Protein powder are specific to the flavor you purchase.


Best Liquids to Mix with Gold Standard Whey Protein Powder

There are many possibilities for mixing Gold Standard protein mix into your beverage—or even food—such as:

  • Soy Milk
  • Almond Milk
  • Coconut Milk
  • Smoothies
  • Water
  • Whole Fat Diary Milk
  • Low / Non-Fat Dairy Milk

Other Uses for Gold Standard Whey

  • Add into cereal with milk
  • Add into oatmeal
  • Cook into donuts and other pastries


Gold Standard Whey Protein Flavor Reviews

Optimum Nutrition offers over 20 flavors of whey protein in their Gold Standard series, and they continue to add more. Here are the top Gold Standard whey flavors, according to consumer reviews.


Gold Standard Whey Protein Flavor Rankings

Rank Flavor More
#1 Extreme Milk Chocolate Full Review
#2 Delicious Strawberry Full Review
#3 Double Rich Chocolate Full Review
#4 Rocky Road Full Review
#5 Banana Cream Full Review
#6 Cake Batter Full Review
#7 Mocha Cappuccino Full Review
#8 White Chocolate Full Review
#9 Chocolate Malt Full Review
#10 Strawberry Banana Full Review
#11 Chocolate Mint Full Review
#12 Chocolate Peanut Butter Full Review
#13 Coffee Full Review
#14 French Vanilla Creme Full Review
#15 Chocolate Coconut Full Review
#16 Vanilla Ice Cream Full Review
#17 Cookies and Cream Full Review

#1. Extreme Milk Chocolate (Best Overall)

This flavor is delicious all around, especially if you are a chocolate lover.

Best with: Soy Milk

Nutrition Summary

Nutritional label for Gold Standard Whey Protein Extreme Milk Chocolate flavor.


#2. Delicious Strawberry (Best with Milk / Soy Milk)

Best with: Soy Milk, Banana / Berry Smoothies

Nutrition Summary

Nutritional label for Gold Standard Whey Protein Delicious Strawberry flavor.


#3. Double Rich Chocolate (Best with Water)

This flavor is solid as they come, and a treat after the gym or a long bike ride for chocolate lovers.

Best with: Water, Soy Milk

Nutrition Summary

Nutritional label for Gold Standard Whey Protein Double Rich Chocolate flavor.


#4. Rocky Road

Nutrition Summary

Nutritional label for Gold Standard Whey Protein Rocky Road flavor.


#5. Banana Cream

Banana Cream seems to have a cult following, and with good reason. It’s just plain delicious, although banana itself can be a polarizing flavor among reviewers.

Best with: Soy Milk

Nutrition Summary

Nutritional label for Gold Standard Whey Protein Banana Cream flavor.


#6. Cake Batter

Best with: Soy Milk

Nutrition Summary

Nutritional label for Gold Standard Whey Protein Cake Batter flavor.


#7. Mocha Cappuccino

Nutrition Summary

Nutritional label for Gold Standard Whey Protein Mocha Cappucino flavor.


#8. White Chocolate

Nutrition Summary

Nutritional label for Gold Standard Protein White Chocolate flavor.


#9. Chocolate Malt

Nutrition Summary

Nutritional label for Gold Standard Whey Protein Chocolate Malt flavor.

#10. Strawberry Banana

Nutrition Summary

Nutritional label for Gold Standard Whey Protein Strawberry Banana flavor.


#11. Chocolate Mint

Nutrition Summary

Nutritional facts for Gold Standard Whey Protein Chocolate Mint flavor.


#12. Chocolate Peanut Butter

Nutrition Summary

Nutritional facts for Gold Standard Whey Protein Chocolate Peanut Butter flavor.


#13. Coffee

Nutrition Summary

Nutritional facts for Gold Standard Coffee flavor.


#14. French Vanilla Creme

Nutrition Summary

Nutritional facts for Gold Standard Whey Protein French Vanilla Creme flavor.


#15. Chocolate Coconut

Nutrition Summary

Nutritional facts for Gold Standard Chocolate Coconut flavor.


#16. Vanilla Ice Cream

Vanilla Ice Cream isn’t bad, assuming you don’t mind the taste of artificial vanilla. Many reviewers on Amazon and other sites were disappointed to find that Sacralose is one of the ingredients, claiming that the artificial sweetener ruins the flavor of the mix.

Best with: Berry & Banana Smoothies

Nutrition Summary

Nutritional label for Gold Standard Vanilla Ice Cream flavor.


#17. Cookies and Cream

There are dozens of reviews on Amazon and BodyBuilding.com with users complaining about this flavor. While other Gold Standard offerings knock it out of the park, this one definitely falls flat.

Nutrition Summary

Nutritional facts for Gold Standard Cookies and Cream flavor.


Frequently Asked Questions about Gold Standard Whey Protein

Is Gold Standard lactose free?

No. Gold Standard contains a small amount of lactose. It also contains added lactase, which assists in breaking down lactose.

Is Gold Standard college athlete approved? NCAA approved?

Yes. All products in Optimum Nutrition’s Gold Standard series are fit for collegiate athletes.

Is Gold Standard Whey Protein vegan?

No; all of this brand’s products contain milk. But, it is vegetarian!

Is Gold Standard FDA approved?

No. Gold Standard Whey Protein is a dietary supplement, and thus, does not require the approval of the Food and Drug Administration.

Is Gold Standard safe / safe for pregnancy?

Yes, but pregnant women should consult a doctor.

Is Gold Standard good for weight loss?

No, it is not a meal replacement. It is a supplement, designed for muscle growth. Best used when paired with exercise, which can result in weight loss and muscle development.

Is Gold Standard Whey Protein healthy?

This is subjective, as the healthiness of whey protein is always a subject of debate—but yes.


via GIPHY


The Best-Tasting and Healthiest Drinking Water

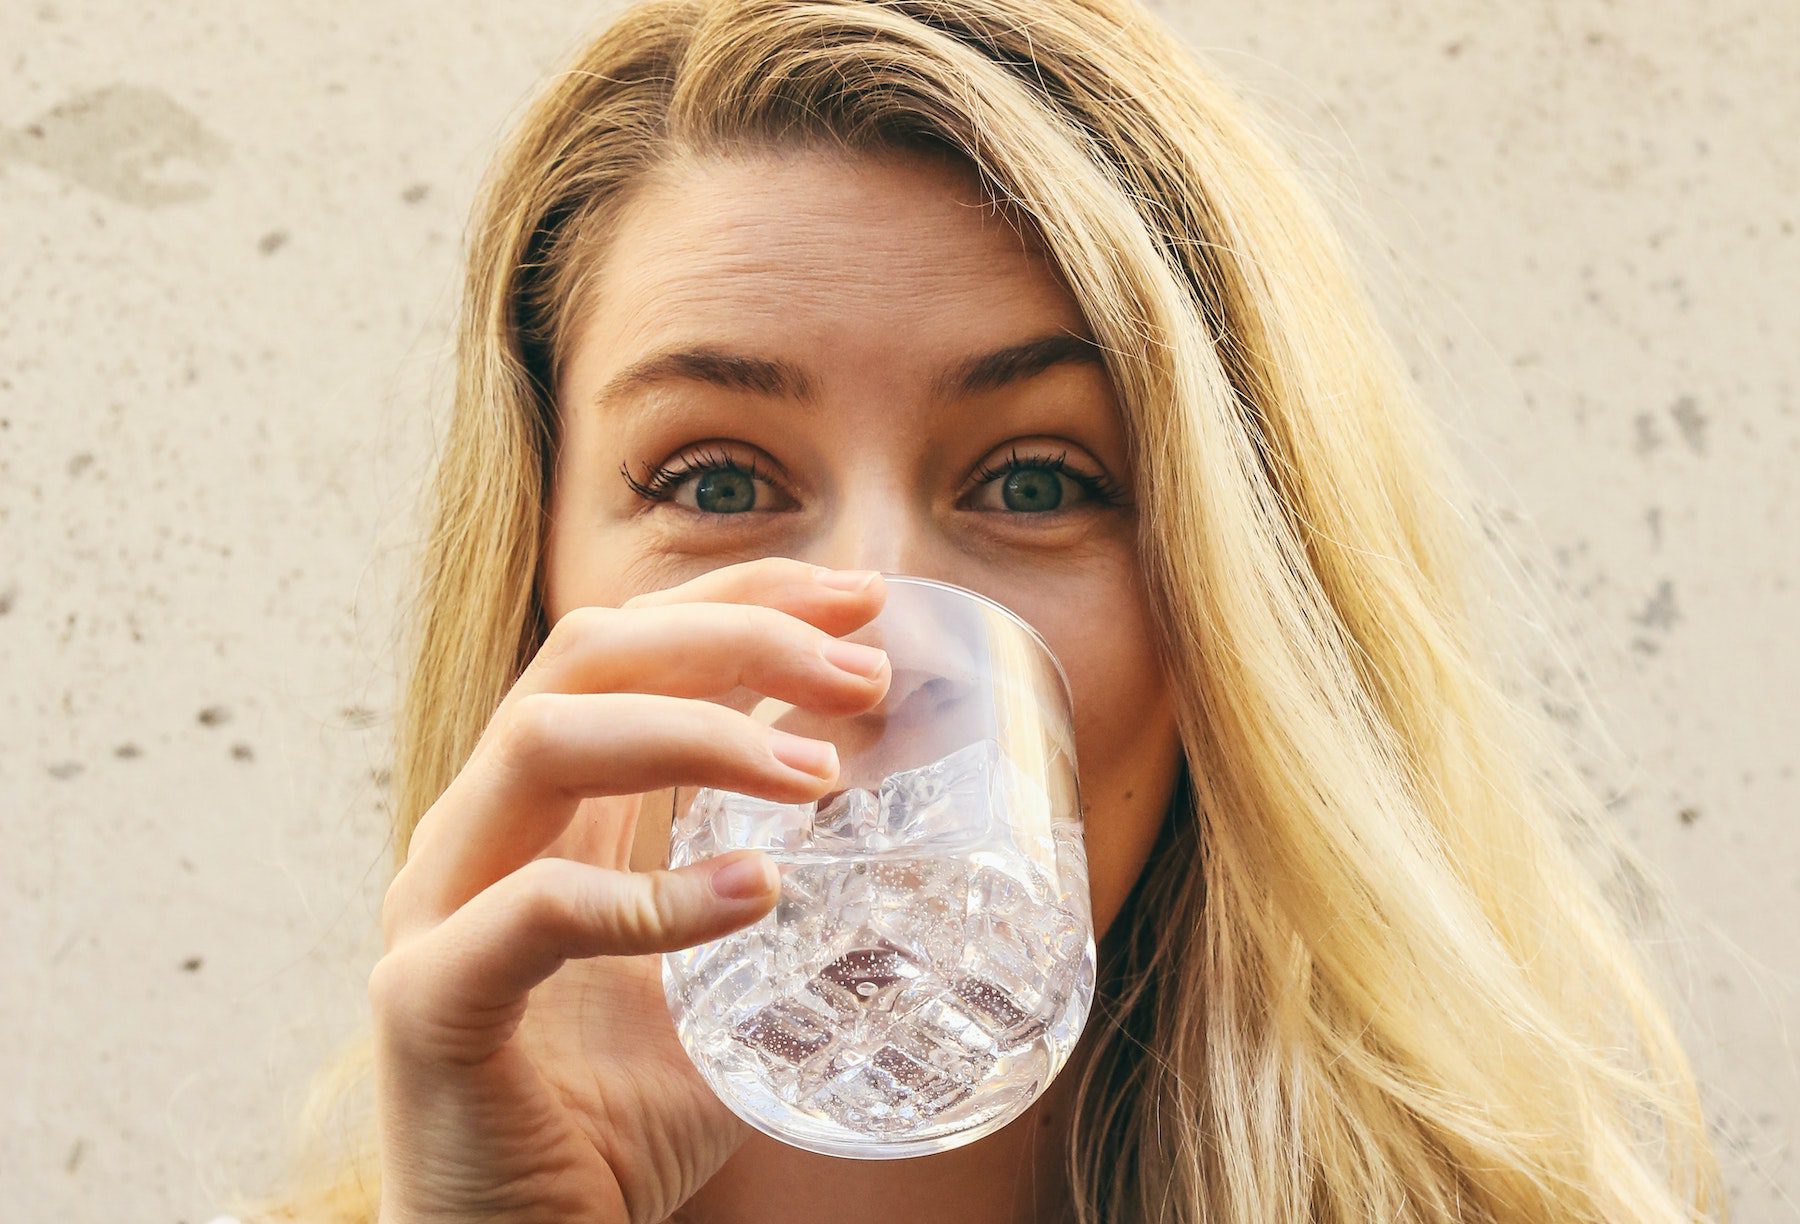
Happy blonde woman drinking water.

Whether steeping a nice cup of English Breakfast or quenching cotton-mouth from that hit of Unquestionably OG, you should always take your drinking water seriously.

These days, almost everyone knows the importance of staying hydrated, and that the average adult body is comprised of about 60% water—even more for those with lots of lean muscle—but too few actually think about the quality of their drinking water.

This guide will help you find the best-tasting and healthiest drinking water to stay hydrated…and explain why tap water ranks dead last.


Best Sources of Drinking Water

Hiker overlooking lake drinking water from orange hydro-flask.

These are the best sources of drinking water, ranked from worst to first.


5 . Tap Water

You’ve likely already consumed tap water whether you were making your favorite kombucha flavors or freezing it for the ice in your smoothie—and that’s perfectly fine.

Despite all the confusion and debate surrounding tap water, it is still good enough to drink or cook with.  However, it does contain certain chemicals you might not want circulating through your body. So, if your put off from cooking with it for the meantime, grab some healthy takeout while you asses these options.

These include chlorine, fluoride, or possible contaminants from compromised water systems.

Additionally, most water treatment methods remove minerals crucial to your health and wellbeing—but more on that below.


4. Home Water Filters

One way to make tap water healthier—and tastier—is to use a water filter.  You can use a pitcher system, like this one from PUR, or a large dispenser that sits on your counter or in the fridge, such as this option from Brita.

There are also faucet systems that allow you to filter one sink in your home, or whole-house systems that deliver clean water to every single faucet.

The drawback to filtration systems of any kind, however, is the price.  Generally speaking, the more you want filtered out of your water, the better filter you’ll need…and the more money you’ll spend on it.

There’s also a time and effort factor involved, since you’ll have to replace filters regularly to keep particle-reduction optimal.   Lastly, refilling pitchers or tanks can be tough to remember.


3. Bottled Water

Bottled water is good for on-the-go hydration or cooking while camping, and is usually clean with a pleasant taste.

The cost adds up, though, as does the plastic.  Filling landfills with that stuff is far from ideal, especially since it takes over 400 years for a single bottle to degrade.

What’s more, that plastic could be harming your health, one sip at a time.

A 2018 study found microplastic contamination in 93% of the bottled water brands it tested, sourced globally from multiple sources.

In terms of health consequences, experts continue to disagree about the effect these particles have on the human body.  Most deem the research inconclusive thus far, but some studies indicate cumulative exposure can lead to toxicity, oxidative stress, chronic inflammation, and neoplasms that may or may not become cancerous.

With that in mind, bottled water is generally fine to consume, and it’s certainly preferable to dehydration.  Exploring more eco-friendly drinking water options, however, is a smart move.


2. Water Store Refills

While some might scoff at the idea of a water store, it’s a wise investment for your health.

Many use multiple processes, which allows you to select the kind of drinking water you’d prefer: alkaline, mineral, oxygenated, and more.

Each type of drinking water has unique benefits or purposes, and even a difference in taste.

As for price, this varies largely by establishment and state. Generally, water stores cost much less compared to purchasing comparable filtration systems for your home.


1. Aquifers and Wells

Undoubtedly, this is the best way to get your drinking water: straight from the source.

Aquifers provide clean water from underground sources, untouched by man and stocked with healthy minerals.  Getting it can be a challenge, however.

Wells are the most common method for extracting water from an aquifer.  Additionally, the water leaves an aquifer over time and goes into springs or streams.

Groundwater is usually safe, given how little interference and exposure it receives, but contamination is still possible.  Oftentimes, trace amounts of fluoride, heavy metal, or household waste can sneak their way inside.

Runoff pollutants can also seep into the groundwater supply—even if you live in an isolated area.

These include pesticides, contaminants found in snow- or rainfall, and medications from yourself or any nearby humans, from anti-inflammatories to antibiotics.

While these usually exist in extremely small amounts, it’s a good idea to test well water periodically.


What’s Wrong with Tap Water?

Glass of water splashing in someone's hand.

Again, it’s important to note that most tap water is okay to drink, particularly when compared to countries lacking sanitation management.

The United States is far from the best, however, among countries with mass filtration systems.  Switzerland, Norway, and several others have America beat on both water taste and quality.

Unsurprisingly, part of this comes down to pollution.  The more pristine an environment is, the less runoff seeps into the groundwater, which means fewer contaminants overall.

What’s more, cleaner groundwater allows for less processing to clean it for consumption.

Another component is how, exactly, the United States cleans its tap water.

Most water plants utilize chemical filtration at some point during the purification process.  Then chlorine or chloramine are added, along with fluoride, before it passes through your pipes.


Chlorine

Chlorine is a bit of a double-edged sword when it comes to tap water.

On the one hand, it keeps waterborne pathogens out of your drinking water.  These can include hepatitis or dysentery, among others.

On the other hand, when chlorine mixes with even trace amounts of natural organic matter in a water supply, it can produce Trihalomethanes, or THMs.  While boiling water can eliminate THMs, common filtration systems like pitchers or faucet systems cannot.

THMs are harmful to your health because they produce free radicals in your body, which can lead to cellular damage.  This can cause inflammation, cardiovascular disease, neurological issues, and even cancer.

Several studies have found increased risk for colorectal cancer, in particular, among chlorinated water drinkers.

Most of the chlorine added to public water supplies will dissolve once it’s pushed through your faucet, however.  Furthermore, a high-quality aerator will help remove it even more efficiently.


Chloramine

Chloramine is a chemical produced when chlorine and ammonia combine.  It puts a coating on the inside of pipes, which reduces the amount of lead that is leached into the water.

It sounds like a good idea on the surface—but if you’ve ever smelled cat urine, attempted to buy ammonia and bleach at the same time, or watched King Of The Hill, you already know how volatile ammonia can be.

Chloramine exposure can result in respiratory issues such as coughing, shortness of breath, chest pain, or even pneumonia.  One study found asthma and reduced pulmonary function were particularly common among indoor pool workers.

It’s important to emphasize that those results involve heavy chloramine exposure.  Drinking tap water isn’t likely to carry the same risk, since the amounts are far smaller.

Still, the studies for long-term, cumulative effects of chloramine via tap water are sorely lacking—so it might be preferable to err on the side of caution.


Fluoride

There’s a great deal of mixed info out there regarding fluoride, and you’ve probably wondered if it’s actually beneficial to your health…or if it’s made your drinking water a ticking time bomb.

Rest assured: like most elements in your tap water, fluoride is regarded as generally safe.  Unless you’re part of the population segment that’s allergic or sensitive to fluoride, a few glasses here and there won’t hurt you.

With that in mind, it’s important to objectively decide if fluoridated water benefits your overall health.


Fluoride Vs. Fluorine: What’s the Difference?

First and foremost, take note that fluoride is not the same as fluorine, a highly reactive electronegative element.  It’s often used in nuclear power plants, and used to be prevalent in everyday objects like fire extinguishers and refrigerators.

However, due to its contribution to ozone depletion, household use of fluorine has been banned since the mid-1990s.

While fluorine gas on its own is explosive and possibly quite dangerous, compounds containing this gas form many substances you can probably still find throughout your home: Teflon-coated pans, certain rain or snow boots—and, of course, the fluoride in toothpaste, mouthwashes, and most areas’ drinking water supplies.

Fluorine occurs naturally in the air, so you’re exposed to this gas in minute amounts regularly.

In large amounts, though, the gas can be deadly.

Fluoride is different from fluorine—it’s the negative ion of that element, and therefore isn’t as reactive. In trace amounts, it can be beneficial to dental health, and most people get some naturally through other means.

Simply put, toothpaste or some tap water isn’t going to kill you.
Where the concern arises, rather, is in how much fluoride you’re getting…and whether or not you actually need so much.


Does Fluoride Really Help Your Teeth?

The simply answer is yes: fluoride helps prevent cavities and tooth decay.

A more complicated and accurate answer, however, is that fluoridated water only reduces the rate of cavities by 25%.

Additionally, although fluoride may aid in the remineralization of bones and enamel, its cavity reduction comes down to bacteria inhibition.

This sounds like a good thing, of course…assuming it’s only affecting bad bacteria.

Recent studies show that your mouth, just like your stomach or skin, has a unique microbiome that not only impacts your oral health, but your gut and overall health, as well.

Since neurotransmitter synthesis begins in the gut, the health of your mouth directly impacts your gut-brain axis. Anything that throws that out of balance—from antibiotics, to mouthwashes…and yes, possibly fluoridated water—can affect your mental state and moods, in turn.

Other studies have shown a clear link between fluoride and impaired thyroid function. In fact, it’s recommended that individuals with hypothyroidism filter their tap water to remove the fluoride.

Even if you don’t have hypothyroidism, your levels can be negatively impacted by the fluoride in your drinking water: perhaps you’re in the “normal range,” but higher than your personal baseline.


Too Much of a Good Thing

Lastly, it’s important to remember the old adage: too much of a good thing…is a bad thing.

Excessive fluoride consumption can lead to fluorosis of the teeth or skeletal system, thereby weakening the very systems it’s meant to strengthen.

While dental fluorosis is very difficult to get, since fluoride simply doesn’t sit on the teeth that long, the skeletal version of this condition results from repeated, cumulative exposure to fluoride.

If your tap water is over fluoridated, that excess could build in your system over several years and cause stiffness, joint pain, or even ligament calcification.

Furthermore, some studies such as this one have linked fluoridated drinking water to increased osteosarcoma in adolescent boys.

Note that no clear-cut, consistent links exist between fluoride consumption and cancer risk. Generally speaking, conclusively determining fluoride’s long-term effects on health requires more research.

So when it comes to your drinking water, you might choose to forgo the unknown, or consume it and hope for the best—or even some of each, if you still want the dental benefits of fluoridation, but with less overall exposure.


Possible Contaminants

Ice dropped into water glass with red paper straw.

Despite all the filtration methods, both physical and chemical, tap water can still be contaminated.

Like groundwater, runoff is a concern.  Any pesticides, herbicides, or industrial waste that touches the earth can later seep into nearby water sources.

Similarly, pollutants in the air can result in contaminated rainwater, snow, or ice.  These can enter water supplies, as well.

Although most filtration methods will eliminate these, there are always exceptions.

This is especially true when the filtration systems or pipe networks become compromised in some way.

Lead or mercury can enter water through natural sources in the ground, too, or from improper disposal of hazardous materials like batteries or paint.

Finally, bacteria and parasites can contaminate tap water if it comes into contact with animal or human feces.

Because pipes run underground, diagnosing a compromised system is tough.  All too often, people don’t notice a problem until their water supply is polluted.


Removal of Important Minerals

Typical tap water filtration removes more than the bad stuff from our drinking water.

Three of the most common minerals filtered out of water—and three of the most crucial minerals the human body needs to function properly—include calcium, iron, and magnesium.

Magnesium alone is responsible for hundreds of enzyme reactions in your body.  Most people don’t get enough through their diet, and have little to no knowledge of its role in overall health.

Besides nerves and muscle function, magnesium helps regulate your heartbeat, blood sugar, and bone and protein synthesis.  It might even help people with anxiety.

Calcium is also critical for bone and nerve health, while iron helps our bodies store and utilize oxygen efficiently.

Of course, the verdict is still out on whether drinking tap water really matters when it comes to these minerals.  A study by the World Health Organization noted that, even when these minerals are in drinking water, they aren’t chelated—which means they aren’t easily absorbed by the body.

In other words, try to get your mineral intake through a healthy, balanced diet, no matter what kind of water you drink.


The Final Word: What’s the Best Drinking Water for You?

Ice water in a Ball mason jar.

Once more, it should be emphasized that any source of decontaminated water is probably generally safe for consumption.

Staying hydrated is critical to your health and wellbeing—so when you’re thirsty, it’s okay to drink what’s on hand, even if it’s not your usual preference.

But overall, well water or filtered sources are best for your everyday water consumption.