How to Get Better Sleep with These Foolproof Formulas

Black man in jean jacket and maroon hoodie naps on a park bench during autumn.

Anxious thoughts race through your mind; you can’t get comfortable. For the thirtieth time in thirty minutes, you check the clock to calculate how much sleep you can still get if you conk out…now.  No, wait: now. No, wait….

Everyone knows quality sleep is crucial, yet few net those six to eight hours needed for good health, improved performance, stabilize moods, and overall better stress management. If you’re struggling from sundown to sun-up, here are some foolproof formulas to get better sleep.


Pro-Sleep Daytime Habits

A bright yellow alarm clock amidst scattered objects on a white bed.


Good sleep actually starts while you’re still awake. Incorporating these healthy habits into your daytime routine will help you rest much better when you hit the hay.


  • The light of day.  Get a hefty dose of natural light early in the day. Circadian rhythms are basically internal clocks, and sunlight prompts the brain to realize, “Hey, it’s morning.” Not only will you fall asleep more easily come nightfall, but you’ll also wake more easily the next morning.


  • Exercise.  Like sunlight, movement prompts the brain to wake up…and tell the rest of the body to follow suit.  Endorphins also result in a better mood, and other hormonal functions will optimize with regular exercise (including melatonin).  Move your body; it doesn’t really matter how.  Aim for 20 to 30 minutes of easy exercise daily, if possible, but avoid doing it within an hour of bedtime.  This can keep your body from settling down and actually delay sleep.


  • A caffeine-free evening.  Keep your coffee or any other caffeinated beverage to the first part of your day (no later than noon, based on most people’s metabolisms and the half-life of caffeine).  No after-dinner s’mores when your camping so try some healthier caffeine-free options instead. Lastly, a ten-minute power nap will do way more for that afternoon slump than another espresso, anyway.


  • Early evening meal.  Snacks are tempting when you’re tired, but think twice: late-night meals confuse your circadian rhythm into wakefulness. Furthermore, it puts extra work on your body to digest during a time it needs to rest.  Avoid heavy dinners, too. Light and healthy options are easier on your digestive system, and will help you wake up feeling refreshed, not bogged-down and bloated.


A dog snuggles with his owner underneath a comforter.


  • An off-limits bed.  The bed may look like one big, comfy couch, but try to reserve it exclusively for sleeping (and maybe one other…ahem, activity).  Overall, you want your brain to associate your bed with sleep, not Netflix binges or answering work emails.


  • A focused mind.  If your brain is constantly looking for stimulation during the day, it will do the same at night. Focus on one task at a time whenever possible. Don’t interrupt your flow by checking your texts and Instagram constantly; instead, set timers so you can take breaks and switch tasks more thoroughly. Lastly, let your mind relax throughout the day.  Ten minutes of “zoning out” or meditating will prime it to shut off come nighttime.


  • Low-stress levels.  Identify your biggest stressors and work on reducing them. Manage your thoughts and talk to people about your stress. Delegate responsibilities to other people. Do whatever you need to lower those stress levels. If you don’t get a moment of peace during the day, you won’t find peace at night.


Ultimately, better sleep requires better discipline. While changing your routines will be hard, one or two alterations at a time will add up to impressive, noticeable results in the quality of your sleep.

Once your daytime habits are optimized, it’s time to take a long, objective look at your nighttime routines and overall sleep hygiene.


A young woman in a tank top and sleep pants stretches in the morning.

Tips to Optimize Your Sleep Schedule and Routine

Consistency is key, here. Tighten the straps on your armor, sleep warrior: you can do this!


  • Reduced light exposure.  Once the sun is gone, limit your exposure to all light sources. This avoids “tricking” your brain into believing daylight has magically extended, and encourages the production of melatonin.  Note: this doesn’t mean you have to live like the Amish after sundown. Simply eliminating screens (any device that emits blue light, like phones and tablets) will make a huge difference. Try to use less lamplight, too, and swap that T.V. binge before bed for some quality time with your favorite comedy book.


  • Consistent bedtime.  Your mom was onto something with that annoying bedtime nonsense of hers. Time to get back to your roots: set an alarm on your phone to start your evening routine at the same time, every night.


  • Consistent wake time.  Setting an alarm to wake you up is common. What about the weekend though? Are you letting yourself sleep in till ten? That alarm should go off every single day.  While an extra thirty minutes or so is fine, waking hours past your usual alarm sets you up for failure come Monday. If you must play catch-up on lost sleep, go to bed earlier instead of sleeping later; it wreaks less havoc on your circadian rhythm.


A woman with her hair in a bun sleeps peacefully in early morning.


  • Pre-Bedtime routine.  There are probably a few things you do every night before getting into bed. For example, you might shower, brush your teeth, and then read a book. Keep this at the same time every day and you are on your way to better sleep. Meditation, listening to calm music, or writing in a journal are also good ideas. Just pick one activity and add it to what you have now.


  • Notebook next to your bed.  A lot of sleep problems arise from anxiety. You might have the next day’s treacherous to-do list racing through your mind. Or maybe it is the argument you had that keeps playing over and over.


Grab a pencil and write down the to-do list. Write down what you want to say to your boyfriend. Promise yourself you will come back to it tomorrow. This helps to relieve yourself of the responsibility of your problems for the night.

Don’t overwhelm yourself with all of these changes at once. That will make it too tempting to give up. Add one thing at a time until your formula has given you the sleep solution you’re after.


Ideal Sleep Environment

A pristine bedroom in dark grays and browns with low light for ideal sleep.


Finally, great sleep requires the right sleep environment.  These are all the things your brain needs to finally stop the stewing, and everything your body needs to unwind after a long day.


  • Comfortable bed.  Backaches, knee problems, neck pain: some of these ailments might be attributable to that lackluster office chair or poor posture, but a good bed should never leave you in pain. If you wake up aching, it’s time to reevaluate your mattress.


Young brunette woman in bright red hoodie naps with her head on a couch armrest.


  • Quiet.  Some nighttime noise is unavoidable (you can’t control those rowdy upstairs neighbors), but try to eliminate any sound you can. Tighten dripping faucets, shut off the television, and crank up a white noise machine to cover the rest.


  • Low temperature.  Keep your thermostat at or below 68 degrees at night.  People sleep best in a cool, dark place.


  • Lights off.  Speaking of darkness: eliminate all sources of light from the bedroom. A blackout curtain will work wonders on those city lights (or even just the moon), and a T-shirt thrown over the pesky neon alarm clock will help, too.  And if you’re the type to sleep with the television on, that’s a definite don’t.  Even if you still fall asleep quickly with it on, you’re probably getting less REM and waking partially throughout the night. Finally, if and when you have to get up during the night, keep lights low or off to avoid waking yourself up too much.


  • Clean room.  A clutter-free space will help your brain associate the space with sleep, and the serenity of a clean, organized room may even help you relax faster.


Quality sleep may seem hopeless, but remember: it’s a science, and can therefore be distilled down to basic formulas. Just as one bad habit can throw the rest off, so can one positive change impact your entire wellbeing.

With enough practice, good sleep routines will become second nature, and you’ll get better sleep without even having to think about it.

Sources
https://www.health.harvard.edu/sleep/8-secrets-to-a-good-nights-sleep
https://www.sleepfoundation.org/articles/healthy-sleep-tips
https://www.healthline.com/nutrition/17-tips-to-sleep-better#1.-Increase-bright-light-exposure-during-the-day

4 Delicious Dinner Recipes for Cooking on A Budget

Blonde woman in an apron cooking dinner on an island covered with checkered tablecloth.

Home-cooked dinners shouldn’t be expensive. They should be delicious, straightforward, and, above all else, affordable. Additionally, many recipes are able to be tweaked to accommodate vegetarians or vegans. Here are four delicious budget dinner recipes to cook when your wallet (and stomach) is nearing empty, and that gas station snack or your favorite ramen just won’t do the trick.


Tortilla Pizza

Tortilla Pizza topped with sauce, cheese, and pepperoni on wooden countertop before baking.

When looking for a quick dinner, most people immediately think of ordering pizza. Sure, that $5.99 deal sounds enticing, but the total adds up quickly after delivery fees and tip.

You could always buy the dough and make a pizza from scratch, but let’s be honest: the convenience factor goes way down with a messy endeavor like that.

That’s where this tortilla pizza comes to the rescue. So versatile, incredibly quick, and requiring very little cleanup, this recipe will become a budget-meal staple in frugal households.

All you really need are 3 ingredients: tortillas, pizza sauce, and shredded cheese. That’s it! If you’re looking to get fancy, though, you can add toppings or spices for a personalized pizza that’s sure to satisfy.


Ingredients:

8-inch flour tortillas
Shredded cheddar cheese
Shredded mozzarella cheese
Pizza sauce
Oregano, salt, and pepper to taste


Directions:

  1. Turn the oven broiler on and place a cast iron skillet on a burner over medium-high heat.
  2. While the burner is heating up, place your flour tortilla onto the skillet. Take a spoonful of pizza sauce and spread it over the top of the tortilla, leaving about a half-inch from the edge for the “crust.”
  3. Take a half-handful of shredded cheddar and a half-handful of shredded mozzarella and spread it evenly around the pizza.
  4. Place the entire skillet and pizza in the oven for about 90 seconds to let the cheese melt and allow the tortilla to crunch up.
  5. Remove pizza from the oven.  Sprinkle with oregano, salt, and pepper to taste.


Buttered Egg Noodles

Buttered Egg Noodles on a tan ceramic plate at a table set for dinner with grapes and rolls.

Pastas (and carbs in general) are a great choice for a budget dinner. Egg noodles are some of the cheapest pasta out there, but have a delicacy and flavor that makes them an ideal match for almost any sauce, soup…or even some classic butter and salt.


Ingredients:

16 ounces of egg noodles
¼ cup (half stick) of butter
Salt and pepper
Parsley

Directions:

  1. Boil about 4 quarts of water in a large pot over high heat. Add a dash of salt and stir.
  2. When the water is boiling, add the egg noodles and cook until desired firmness – usually around 8 to 10 minutes.
  3. Drain the water, but do not rinse the noodles! Add the butter to the hot egg noodles and toss until the butter is melted. Season with salt and pepper to taste.
  4. Serve in a bowl and garnish with parsley.


Oven-Baked Chicken with Rice Pilaf

Baked chicken and rice on a white plate on top of a bamboo placemat.

Don’t assume you have to break the bank to include some meat on the menu. Chicken can be inexpensive and elegant, for savvy shoppers who know where to score good deals.

For this dish, bone-in chicken thighs are recommended: they’re a great value for the price, particularly when paired with a cheap but fancy rice pilaf.


Ingredients:

1 lb. bone-in chicken thighs with skin
Salt and pepper
Garlic powder
Onion powder
Paprika
Near East Rice Pilaf Mix


Directions:

  1. Preheat the oven to 375°F. Coat the bottom of a metal pan in olive or vegetable oil.
  2. Pat dry the chicken thighs and season both sides generously with salt, pepper, garlic powder, onion powder, and paprika. Make sure to season underneath the skin!
  3. Place the chicken onto the pan, skin-side down, taking care to not overlap the chicken.
  4. Insert the pan into the oven for 15 minutes. After 15 minutes, flip the chicken and insert for another 15 minutes or until the internal temperature reaches 165°F and the juices run clear.
  5. Turn the broiler on until the chicken’s skin reaches desired crispness.
  6. Prepare the Rice Pilaf Mix according to the box over the stove or in a microwave. Serve the chicken and rice pilaf together.


Fried Rice

Fried rice with vegetables in a light green bowl on a white plank table with chopsticks.

Without a doubt, fried rice is one of the best budget dinner recipes to cook at home.  Entirely customizable to your tastes and ingredients, it’s a bit of a “catch all” dish. It allows you to use those wilting veggies and random leftovers nobody seems to want. If you’re feeling extra adventurous, you can pair your fried rice with a hot bowl of ramen.

It’s also convenient, cooked in a single pan or wok and served in bowls (and less dishes is always a good thing).

Keep in mind that creativity really makes this dish. That last bit of rotisserie chicken or leftover steak from Tuesday don’t have to wait out the clock until trash day: toss them in and fry them up!


Ingredients:

3 cups of cooked, day-old white rice; can also refrigerate fresh rice on a cookie sheet until cold
1 bag of frozen vegetables (peas, carrots, and corn); can substitute fresh or canned, if drained completely
3 eggs
2 tbsp minced garlic
Soy sauce
Sesame oil

Directions:

  1. The day before you make the fried rice, cook your white rice and throw it in the refrigerator to dry it out. You can skip this step and use fresher rice, but beware: your fried rice may get sticky!
  2. In a large skillet over medium heat, drizzle sesame oil. Add minced garlic and stir until fragrant.
  3. Add the rice in clumps and stir.
  4. Continue frying the rice for about 5 to 8 minutes, or until the rice is warmed and very slightly browned.
  5. Mix in the frozen vegetables, then pour in about a 1/3 cup of soy sauce. Stir.
  6. After about 3 minutes, push the fried rice to the edges of the pan to create an opening in the middle. Add the eggs and beat. Stir the rice into the eggs and continue mixing until the eggs are thoroughly cooked.
  7. Add more soy sauce if needed and enjoy!


via GIPHY

These budget dinner recipes leave plenty of room for creativity, so the next time you’re watching your favorite food documentary and your creativity strikes, or even if you’re just feeling a little bored and you’re looking for something to do, feel free to substitute ingredients and add others when the pantry and fridge aren’t as well-stocked as you’d prefer.


The Best-Tasting and Healthiest Drinking Water

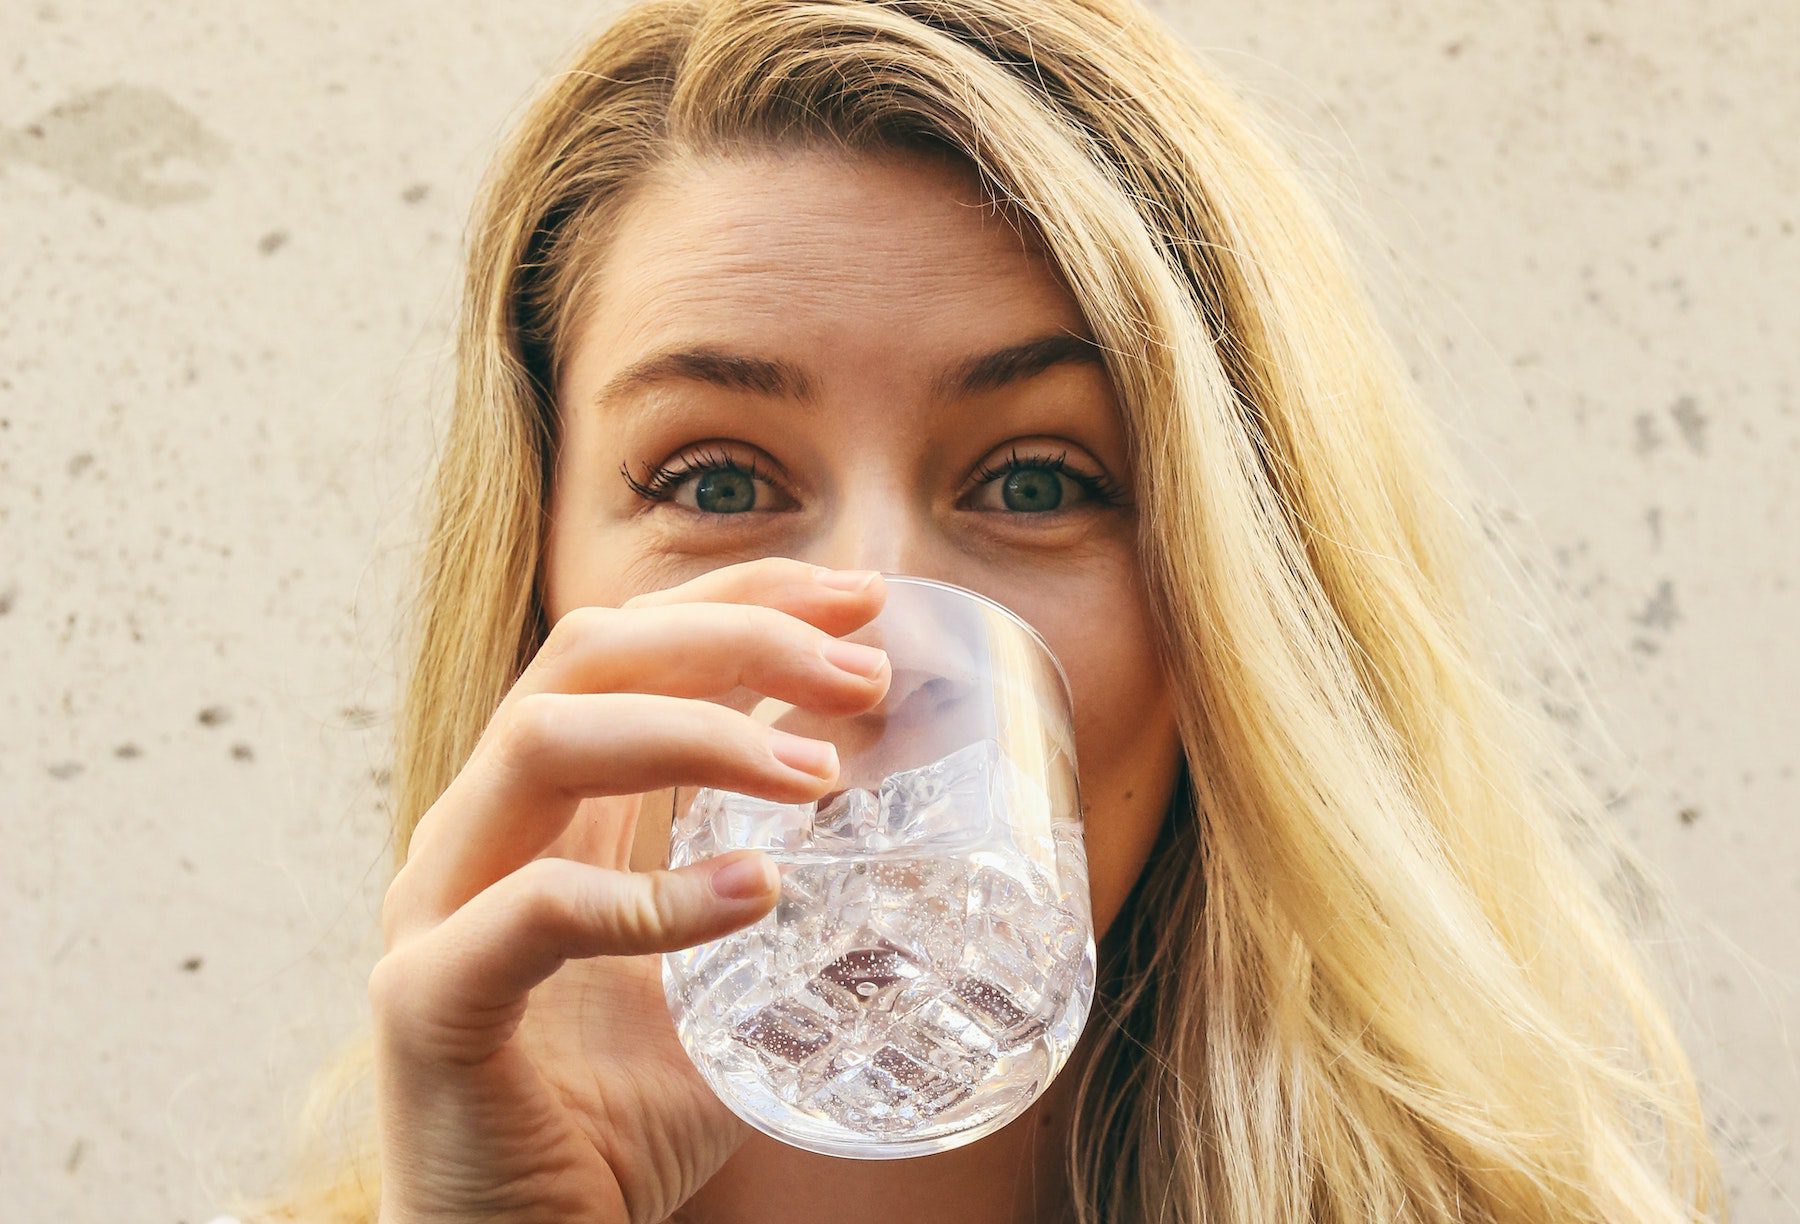
Happy blonde woman drinking water.

Whether steeping a nice cup of English Breakfast or quenching cotton-mouth from that hit of Unquestionably OG, you should always take your drinking water seriously.

These days, almost everyone knows the importance of staying hydrated, and that the average adult body is comprised of about 60% water—even more for those with lots of lean muscle—but too few actually think about the quality of their drinking water.

This guide will help you find the best-tasting and healthiest drinking water to stay hydrated…and explain why tap water ranks dead last.


Best Sources of Drinking Water

Hiker overlooking lake drinking water from orange hydro-flask.

These are the best sources of drinking water, ranked from worst to first.


5 . Tap Water

You’ve likely already consumed tap water whether you were making your favorite kombucha flavors or freezing it for the ice in your smoothie—and that’s perfectly fine.

Despite all the confusion and debate surrounding tap water, it is still good enough to drink or cook with.  However, it does contain certain chemicals you might not want circulating through your body. So, if your put off from cooking with it for the meantime, grab some healthy takeout while you asses these options.

These include chlorine, fluoride, or possible contaminants from compromised water systems.

Additionally, most water treatment methods remove minerals crucial to your health and wellbeing—but more on that below.


4. Home Water Filters

One way to make tap water healthier—and tastier—is to use a water filter.  You can use a pitcher system, like this one from PUR, or a large dispenser that sits on your counter or in the fridge, such as this option from Brita.

There are also faucet systems that allow you to filter one sink in your home, or whole-house systems that deliver clean water to every single faucet.

The drawback to filtration systems of any kind, however, is the price.  Generally speaking, the more you want filtered out of your water, the better filter you’ll need…and the more money you’ll spend on it.

There’s also a time and effort factor involved, since you’ll have to replace filters regularly to keep particle-reduction optimal.   Lastly, refilling pitchers or tanks can be tough to remember.


3. Bottled Water

Bottled water is good for on-the-go hydration or cooking while camping, and is usually clean with a pleasant taste.

The cost adds up, though, as does the plastic.  Filling landfills with that stuff is far from ideal, especially since it takes over 400 years for a single bottle to degrade.

What’s more, that plastic could be harming your health, one sip at a time.

A 2018 study found microplastic contamination in 93% of the bottled water brands it tested, sourced globally from multiple sources.

In terms of health consequences, experts continue to disagree about the effect these particles have on the human body.  Most deem the research inconclusive thus far, but some studies indicate cumulative exposure can lead to toxicity, oxidative stress, chronic inflammation, and neoplasms that may or may not become cancerous.

With that in mind, bottled water is generally fine to consume, and it’s certainly preferable to dehydration.  Exploring more eco-friendly drinking water options, however, is a smart move.


2. Water Store Refills

While some might scoff at the idea of a water store, it’s a wise investment for your health.

Many use multiple processes, which allows you to select the kind of drinking water you’d prefer: alkaline, mineral, oxygenated, and more.

Each type of drinking water has unique benefits or purposes, and even a difference in taste.

As for price, this varies largely by establishment and state. Generally, water stores cost much less compared to purchasing comparable filtration systems for your home.


1. Aquifers and Wells

Undoubtedly, this is the best way to get your drinking water: straight from the source.

Aquifers provide clean water from underground sources, untouched by man and stocked with healthy minerals.  Getting it can be a challenge, however.

Wells are the most common method for extracting water from an aquifer.  Additionally, the water leaves an aquifer over time and goes into springs or streams.

Groundwater is usually safe, given how little interference and exposure it receives, but contamination is still possible.  Oftentimes, trace amounts of fluoride, heavy metal, or household waste can sneak their way inside.

Runoff pollutants can also seep into the groundwater supply—even if you live in an isolated area.

These include pesticides, contaminants found in snow- or rainfall, and medications from yourself or any nearby humans, from anti-inflammatories to antibiotics.

While these usually exist in extremely small amounts, it’s a good idea to test well water periodically.


What’s Wrong with Tap Water?

Glass of water splashing in someone's hand.

Again, it’s important to note that most tap water is okay to drink, particularly when compared to countries lacking sanitation management.

The United States is far from the best, however, among countries with mass filtration systems.  Switzerland, Norway, and several others have America beat on both water taste and quality.

Unsurprisingly, part of this comes down to pollution.  The more pristine an environment is, the less runoff seeps into the groundwater, which means fewer contaminants overall.

What’s more, cleaner groundwater allows for less processing to clean it for consumption.

Another component is how, exactly, the United States cleans its tap water.

Most water plants utilize chemical filtration at some point during the purification process.  Then chlorine or chloramine are added, along with fluoride, before it passes through your pipes.


Chlorine

Chlorine is a bit of a double-edged sword when it comes to tap water.

On the one hand, it keeps waterborne pathogens out of your drinking water.  These can include hepatitis or dysentery, among others.

On the other hand, when chlorine mixes with even trace amounts of natural organic matter in a water supply, it can produce Trihalomethanes, or THMs.  While boiling water can eliminate THMs, common filtration systems like pitchers or faucet systems cannot.

THMs are harmful to your health because they produce free radicals in your body, which can lead to cellular damage.  This can cause inflammation, cardiovascular disease, neurological issues, and even cancer.

Several studies have found increased risk for colorectal cancer, in particular, among chlorinated water drinkers.

Most of the chlorine added to public water supplies will dissolve once it’s pushed through your faucet, however.  Furthermore, a high-quality aerator will help remove it even more efficiently.


Chloramine

Chloramine is a chemical produced when chlorine and ammonia combine.  It puts a coating on the inside of pipes, which reduces the amount of lead that is leached into the water.

It sounds like a good idea on the surface—but if you’ve ever smelled cat urine, attempted to buy ammonia and bleach at the same time, or watched King Of The Hill, you already know how volatile ammonia can be.

Chloramine exposure can result in respiratory issues such as coughing, shortness of breath, chest pain, or even pneumonia.  One study found asthma and reduced pulmonary function were particularly common among indoor pool workers.

It’s important to emphasize that those results involve heavy chloramine exposure.  Drinking tap water isn’t likely to carry the same risk, since the amounts are far smaller.

Still, the studies for long-term, cumulative effects of chloramine via tap water are sorely lacking—so it might be preferable to err on the side of caution.


Fluoride

There’s a great deal of mixed info out there regarding fluoride, and you’ve probably wondered if it’s actually beneficial to your health…or if it’s made your drinking water a ticking time bomb.

Rest assured: like most elements in your tap water, fluoride is regarded as generally safe.  Unless you’re part of the population segment that’s allergic or sensitive to fluoride, a few glasses here and there won’t hurt you.

With that in mind, it’s important to objectively decide if fluoridated water benefits your overall health.


Fluoride Vs. Fluorine: What’s the Difference?

First and foremost, take note that fluoride is not the same as fluorine, a highly reactive electronegative element.  It’s often used in nuclear power plants, and used to be prevalent in everyday objects like fire extinguishers and refrigerators.

However, due to its contribution to ozone depletion, household use of fluorine has been banned since the mid-1990s.

While fluorine gas on its own is explosive and possibly quite dangerous, compounds containing this gas form many substances you can probably still find throughout your home: Teflon-coated pans, certain rain or snow boots—and, of course, the fluoride in toothpaste, mouthwashes, and most areas’ drinking water supplies.

Fluorine occurs naturally in the air, so you’re exposed to this gas in minute amounts regularly.

In large amounts, though, the gas can be deadly.

Fluoride is different from fluorine—it’s the negative ion of that element, and therefore isn’t as reactive. In trace amounts, it can be beneficial to dental health, and most people get some naturally through other means.

Simply put, toothpaste or some tap water isn’t going to kill you.

Where the concern arises, rather, is in how much fluoride you’re getting…and whether or not you actually need so much.


Does Fluoride Really Help Your Teeth?

The simply answer is yes: fluoride helps prevent cavities and tooth decay.

A more complicated and accurate answer, however, is that fluoridated water only reduces the rate of cavities by 25%.

Additionally, although fluoride may aid in the remineralization of bones and enamel, its cavity reduction comes down to bacteria inhibition.

This sounds like a good thing, of course…assuming it’s only affecting bad bacteria.

Recent studies show that your mouth, just like your stomach or skin, has a unique microbiome that not only impacts your oral health, but your gut and overall health, as well.

Since neurotransmitter synthesis begins in the gut, the health of your mouth directly impacts your gut-brain axis. Anything that throws that out of balance—from antibiotics, to mouthwashes…and yes, possibly fluoridated water—can affect your mental state and moods, in turn.

Other studies have shown a clear link between fluoride and impaired thyroid function. In fact, it’s recommended that individuals with hypothyroidism filter their tap water to remove the fluoride.

Even if you don’t have hypothyroidism, your levels can be negatively impacted by the fluoride in your drinking water: perhaps you’re in the “normal range,” but higher than your personal baseline.


Too Much of a Good Thing

Lastly, it’s important to remember the old adage: too much of a good thing…is a bad thing.

Excessive fluoride consumption can lead to fluorosis of the teeth or skeletal system, thereby weakening the very systems it’s meant to strengthen.

While dental fluorosis is very difficult to get, since fluoride simply doesn’t sit on the teeth that long, the skeletal version of this condition results from repeated, cumulative exposure to fluoride.

If your tap water is over fluoridated, that excess could build in your system over several years and cause stiffness, joint pain, or even ligament calcification.

Furthermore, some studies such as this one have linked fluoridated drinking water to increased osteosarcoma in adolescent boys.

Note that no clear-cut, consistent links exist between fluoride consumption and cancer risk. Generally speaking, conclusively determining fluoride’s long-term effects on health requires more research.

So when it comes to your drinking water, you might choose to forgo the unknown, or consume it and hope for the best—or even some of each, if you still want the dental benefits of fluoridation, but with less overall exposure.


Possible Contaminants

Ice dropped into water glass with red paper straw.

Despite all the filtration methods, both physical and chemical, tap water can still be contaminated.

Like groundwater, runoff is a concern.  Any pesticides, herbicides, or industrial waste that touches the earth can later seep into nearby water sources.

Similarly, pollutants in the air can result in contaminated rainwater, snow, or ice.  These can enter water supplies, as well.

Although most filtration methods will eliminate these, there are always exceptions.

This is especially true when the filtration systems or pipe networks become compromised in some way.

Lead or mercury can enter water through natural sources in the ground, too, or from improper disposal of hazardous materials like batteries or paint.

Finally, bacteria and parasites can contaminate tap water if it comes into contact with animal or human feces.

Because pipes run underground, diagnosing a compromised system is tough.  All too often, people don’t notice a problem until their water supply is polluted.


Removal of Important Minerals

Typical tap water filtration removes more than the bad stuff from our drinking water.

Three of the most common minerals filtered out of water—and three of the most crucial minerals the human body needs to function properly—include calcium, iron, and magnesium.

Magnesium alone is responsible for hundreds of enzyme reactions in your body.  Most people don’t get enough through their diet, and have little to no knowledge of its role in overall health.

Besides nerves and muscle function, magnesium helps regulate your heartbeat, blood sugar, and bone and protein synthesis.  It might even help people with anxiety.

Calcium is also critical for bone and nerve health, while iron helps our bodies store and utilize oxygen efficiently.

Of course, the verdict is still out on whether drinking tap water really matters when it comes to these minerals.  A study by the World Health Organization noted that, even when these minerals are in drinking water, they aren’t chelated—which means they aren’t easily absorbed by the body.

In other words, try to get your mineral intake through a healthy, balanced diet, no matter what kind of water you drink.


The Final Word: What’s the Best Drinking Water for You?

Ice water in a Ball mason jar.

Once more, it should be emphasized that any source of decontaminated water is probably generally safe for consumption.

Staying hydrated is critical to your health and wellbeing—so when you’re thirsty, it’s okay to drink what’s on hand, even if it’s not your usual preference.

But overall, well water or filtered sources are best for your everyday water consumption.


Guide to Kombucha: Benefits, Brands, and How to Make It

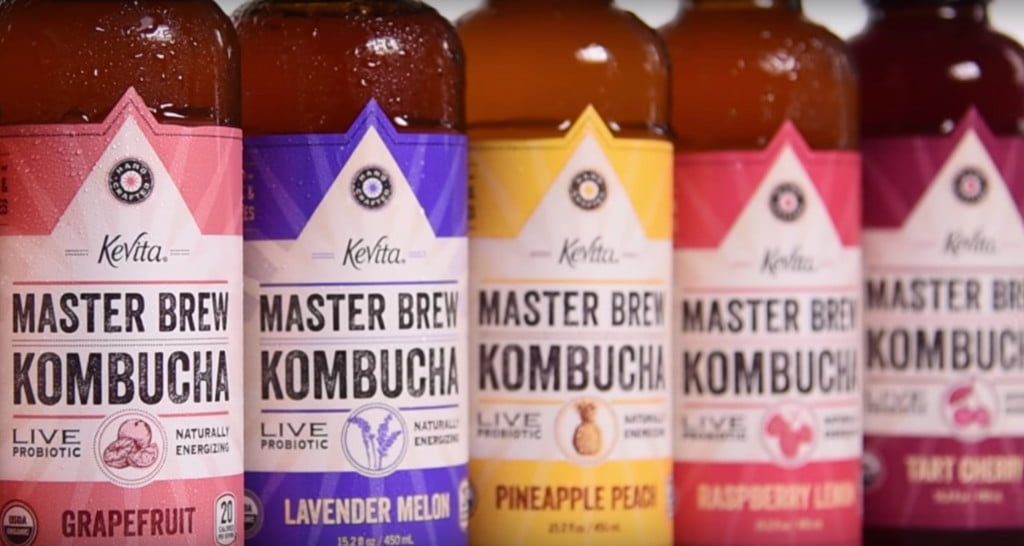
Varieties of Kevita brand kombucha.

Kombucha is a hot trend these days, and with good reason. Not only is it delicious, but it’s also believed to promote good health and naturally energizing. It may be a better morning alternative for some than instant coffee.

In this comprehensive guide, you’ll learn key information about kombucha and its health benefits.  It also covers the most popular brands and flavors, as well as how to brew your own.


What is Kombucha?

Woman's hand around glass of ruby-colored homemade kombucha.

Kombucha is a beverage made by fermenting bacteria and yeast with black or green tea, as well as sugar. While alcohol is usually present due to fermentation, the amount tends to be minimal.

It is enjoyed around the world for its health benefits and unique flavor, which is highly adaptable to personal tastes and preferences.


Health Benefits of Kombucha

  • Kombucha is rich with probiotics that aid the digestive process, as well as antioxidants.
  • It contains polyphenols and acetic acid, which help to prevent growth of undesirable bacteria.
  • In some studies, it has been shown to improve cholesterol levels.


What Is a SCOBY?

SCOBY stands for “symbiotic culture of bacteria and yeast.”

It is sometimes referred to as a mother, mother culture, kombucha culture, pellicle, pancake, or mushroom.

This gelatinous mat of bacteria and yeast is a living body, similar to a coral reef in the ocean.  You can often see pieces of the SCOBY present in both homemade kombucha, as well as store-bought, although some manufacturers filter it out.

This great video by YBK explains SCOBY in more detail:

How to Make a SCOBY

Unseen person's hands holding SCOBY from homemade kombucha.

  1. Boil 1 gallon of water in a large clean pot.
  2. Once the water is to a boil, remove it from heat, and add / mix in 1 cup of sugar.
  3. After the sugar is evenly mixed into the water, drop in the 8 bags of black or green tea, and let the tea steep into the hot water. You only need to steep the tea for 3 to 4 minutes.  While steeping for longer is OK, the blend might become bitter.
  4. Allow the sugary tea to cool until it reaches room temperature.
  5. Transfer 3 1/2 quarts of the tea mixture into an empty 1-gallon jar.
  6. Add 2 cups of unflavored and unpasteurized kombucha.  This can be store-bought, or reserved from another batch.
  7. Place the woven cloth, or two layers of a paper towel, over the jar.  Secure it using a rubber band.
  8. Set the jar out of direct sunlight, then let it sit for 2-4 weeks.
  9. Wait for a 1/4-inch gelatinous disc to form near the top of the jar.
  10. Inspect the new SCOBY. Make sure the jar doesn’t smell rancid or off-putting. If it does, restart the process.


GT’s Living Foods

GT’s makes a variety of “living beverages” besides its organic and raw kombucha, including adaptogenic tea, water kefir, non-dairy coconut yogurt, and probiotic shots.

Their kombucha comes in several varieties:

  • Enlightened Kombucha: This is brewed with living cultures, yielding a light and smooth tasting probiotic powerhouse.
  • Enlightened Synergy: This is brewed with living cultures, and contains fresh-pressed organic juice or fruit puree, making it the smoothest of their offerings.
  • Classic Kombucha: This combines their Organic & Raw Kombucha with complex blends of vegetable juices, spices, herbs, and botanics. It is brewed with heirloom cultures to bring the same signature, small-batch taste that GT’s first introduced in 1995. This is for kombucha drinkers 21 and older, because the fermentation gives this an alcohol content above 0.5%.
  • Classic Synergy: This combines their Organic & Raw Kombucha with fresh-pressed organic juice or fruit puree.  Like the Classic Kombucha variety, its alcohol content is above 0.5%, so it’s for ages 21 and older.


Best GT’s Kombucha Flavors

Rank Flavor
#1 Gingerade
#2 Trilogy
#3 Grape
#4 Lavender Love
#5 Pomegranate Power
#6 Watermelon Wonder
#7 Ginger Berry
#8 Passionberry Bliss


Kevita

Kevita’s flavors are not as pungent as others on the market.  For that reason, don’t go reaching for your favorite smoothie just yet! Kevita is a great gateway for new drinkers who haven’t quite acquired the taste for kombucha yet.

Additionally, the bottles typically contain no SCOBY.  Their flavors are more like flavored sparkling water, rather than a probiotic beverage.


Best Kevita Kombucha Flavors

Rank Flavor
#1 Pineapple Peach
#2 Tart Cherry
#3 Pomegranate
#4 Ginger


Health-Ade

Health-Ade is a very popular brand, brewed in Los Angeles, California. You can likely find this brand anywhere from large supermarkets to your local gas stations while your grabbing your favorite snacks.

The company boasts that their brewing process is “All Glass,” meaning they don’t use any metal or plastic containers to prevent leaching of the materials into the brew.

Health-Ade also brews in 2.5-gallon batches.  This small size yields quality results for every serving.

Best of all, they use high-quality ingredients, and cold-pressed juices from organic produce.


Best Flavors of Health-Ade

Rank Flavor
#1 Bubbly Rose
#2 Pomegranate
#3 Grape Vibes
#4 Cherry-Berry


Humm

Founded in Bend, Oregon, Humm is a brand built on inclusion and communication, with a vision of peace, mutual respect, and equality.  It’s available in all 50 states, as well as Sweden and Guam.


Best Flavors of Humm

Rank Flavor
#1 Blackberry
#2 Pineapple Tumeric
#3 Hopped Grapefruit
#4 Pomegranate Lemonade
#5 Lemon Ginger
#6 Strawberry Lemonade
#7 Mango Passionfruit
#8 Coconut Lime
#9 Raspberry Hops
#10 Ginger Juniper


How to Make Kombucha at Home

Large jar and bottle of homemade black tea kombucha and SCOBY.

Brewing your own kombucha sounds far more complicated than it really is, once you’re accustomed to the process.

Many drinkers prefer their own brews in both taste and quality, in fact, and rarely—if ever—purchase store brands again.


Ingredients

  • Gallon of water
  • 1 cup of sugar
  • 8 bags of black or green tea
  • 2 cups of starter kombucha tea (unpasteurized/neutral flavor; can be store-bought, or reserved from a previous brew)
  • 1 SCOBY, or the ingredients to make one:
    • Gallon of water
    • 1 cup of sugar
    • 8 bags of black or green tea
    • 2 cups of starter kombucha tea

Equipment

  • Large pot
  • 1-gallon jar
  • Tightly woven cloth (or paper towels)
  • Rubber bands
  • Small funnel
  • 6 16-oz glass bottles

If you need to acquire any or all of these things, this Kombucha Starter Kit has everything you need. The kombucha tea blend is easy to use as your favorite protein powder!


Directions

1. Make the tea base for the SCOBY

The SCOBY (Symbiotic Culture of Bacteria and Yeast) is the key to the entire process, and where the probiotics and many health benefits of this drink stem from.

To make the tea base for your SCOBY, boil a gallon of water in a large clean pot. Remove from heat, then mix in a cup of sugar.

After the sugar is evenly mixed into the water, drop in the 8 bags of black tea.  Let the tea steep into the hot water.

You only need to steep the tea for 3 to 4 minutes.  Steeping for longer is fine, although the blend can become bitter if steeped too long.

Finally, let the sugary tea cool until it reaches room temperature.


2. Add the starter kombucha

Add 2 cups of unflavored and unpasteurized kombucha.  This can be store-bought, or reserved from a previous batch of kombucha.


3. Add the SCOBY

Gently place the SCOBY into the jar with the tea mixture, and cover it with the tightly-woven cloth.  Two layers of paper towels will work fine, as well.  Secure with a rubber band.


Two large jars of homemade kombucha covered with cloth and rubber bands.


4. Ferment for 7-10 days

Let the mixture sit, out of direct sunlight, for 7-10 days.

After 7 days, you can begin to taste the kombucha every day. When it reaches a flavorful balance of sweet and tart, the batch is ready.


5. Remove the SCOBY

At this point, you’ll want to remove the SCOBY from the jar. If you’d like to make another batch, you can re-use this SCOBY in this same process.


6. Transfer to bottles

Using the small funnel, transfer the liquid into the glass bottles, then seal them shut.

If needed, use a ladle or small cup to move the liquid from the large jar into the funnel.


7. Store at room temperature for 1-3 days

This is where the kombucha will carbonate. Keep the bottles out of direct sunlight for 1-3 days during this process.

It might be helpful to put some of the new kombucha into a plastic bottle before this step.

This will help you gauge how long the drink takes to carbonate, by feeling the firmness of the bottle—once the plastic bottle becomes very firm, the drink is sufficiently carbonated.


8. Refrigerate

Refrigerating the kombucha will stop it from carbonating further. And once it’s cold, it’s ready for you to drink!


Hand pouring pinkish purple kombucha into an overflowing glass.

While it’s definitely an acquired taste for many, most kombucha enthusiasts will tell you it’s not just the taste you’ll fall in love with—it’s how this drink makes you feel that’s so irresistible.

Many claim their digestion, mood, sleep, and overall health improve noticeably, once this fizzy drink joins their fridge lineup.